

What is OpenCode?
OpenCode is an open-source artificial intelligence (AI) code agent that is deployed locally. It is designed to assist developers with code development and other day-to-day tasks. OpenCode integrates various large language models (LLMs), both locally and via APIs, some of which will be discussed in this post.
Installing OpenCode and getting started
To start using OpenCode, you can run the installation script provided by the tool itself:
curl -fsSL https://opencode.ai/install | bashOnce installed, you can modify the global settings via a JSON file located at ~/.config/opencode/opencode.json. Additionally, this JSON file can also be configured at the project level by placing it in the project’s root directory. Later in this post, we’ll use it to add local models.
When this part is ready, you can launch the tool in the terminal or as a web application in your browser using the following commands, respectively:
opencode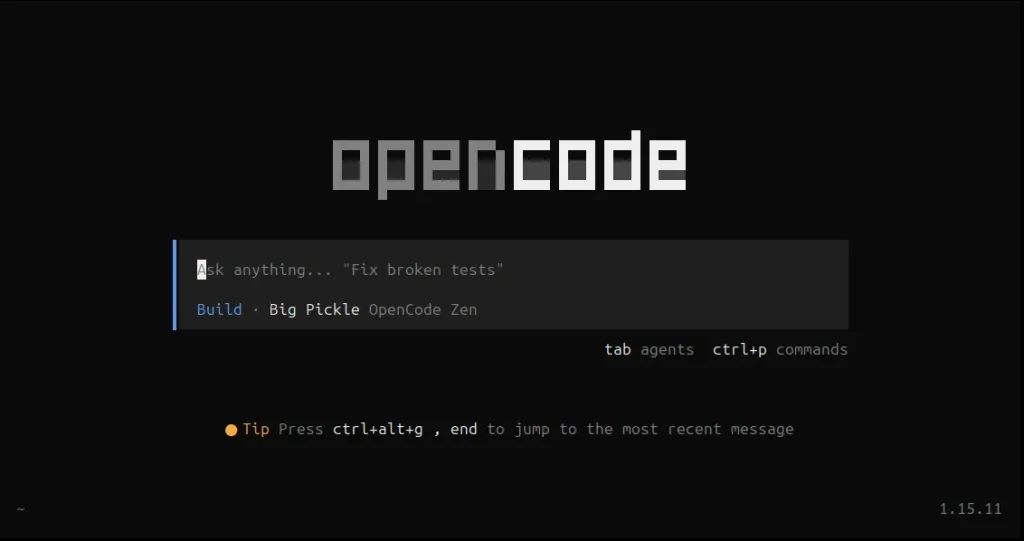
opencode web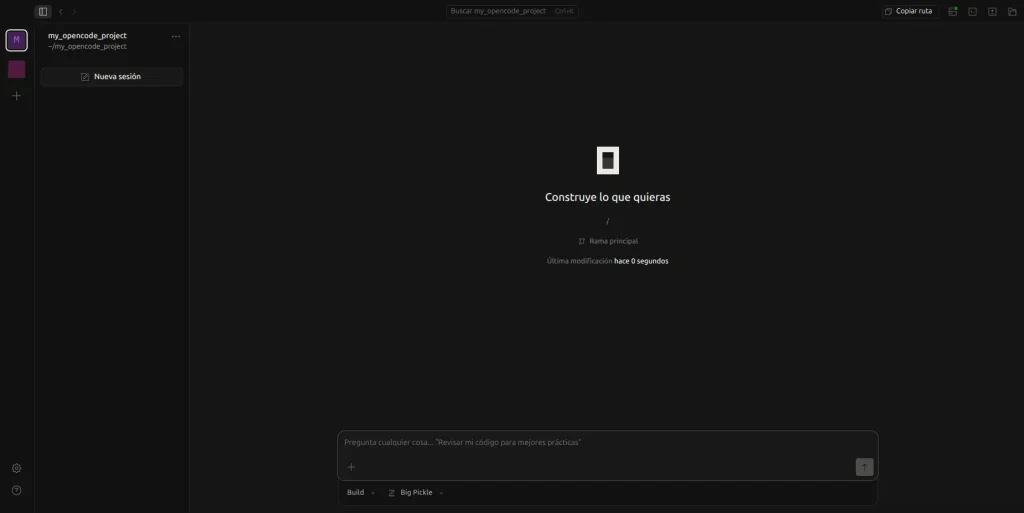
This article will use the web version, as it is more familiar and similar to other AI services. To start working on a project, click the + icon on the left sidebar or press Ctrl+O.
Once you’re in the desired project, you can start talking to the agent. The text box also allows you to enter a series of commands starting with the / character. If it’s an existing project, running the /init command will generate an AGENTS.md file in the project based on its content. Later in this post, we’ll demonstrate how this file works.
Additionally, just below the text box, there are two quick selectors. The first allows you to switch the agent’s mode between planning actions based on user input (plan) or executing them directly (build). The second selector allows you to easily switch models. Next, we’ll explore some model options.
Configuring models in OpenCode
OpenCode supports a wide variety of LLM models to connect to, as it integrates with platforms such as AI SDK and Models.dev. The documentation provides an extensive list of providers to connect to. In this section, we’ll explore some free options available to users for testing this tool.
OpenCode Zen Templates
OpenCode Zen is a platform created by OpenCode itself. This platform includes multiple templates that have been verified and tested to work with OpenCode. It also offers an API that users can connect to. However, there are a number of models offered for free that are directly available upon installation of the tool. These models are offered on a temporary basis for the purpose of testing and verifying their functionality, so the number of available models may vary from time to time.
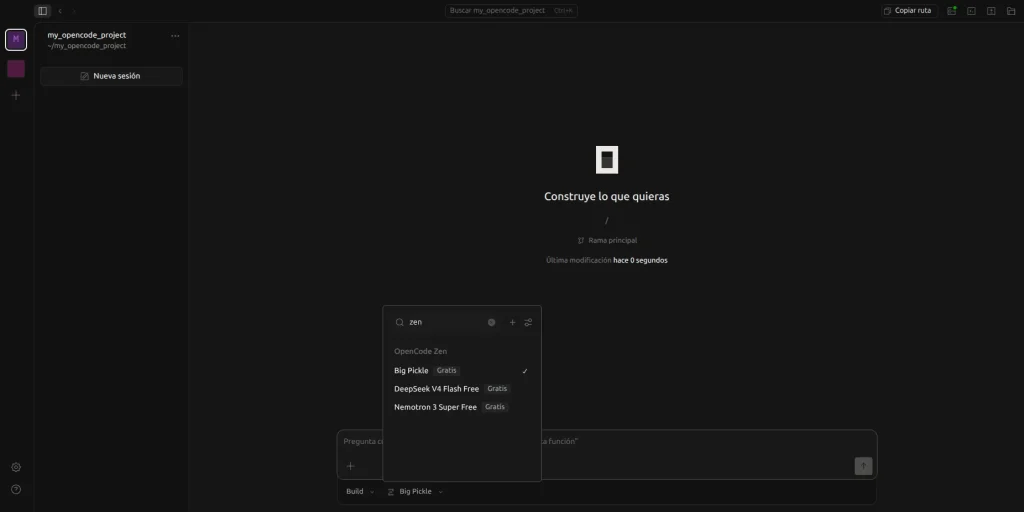
On the other hand, if you want to use the payment models available through the API, you must log in to the OpenCode Zen website. Next, copy the API key:
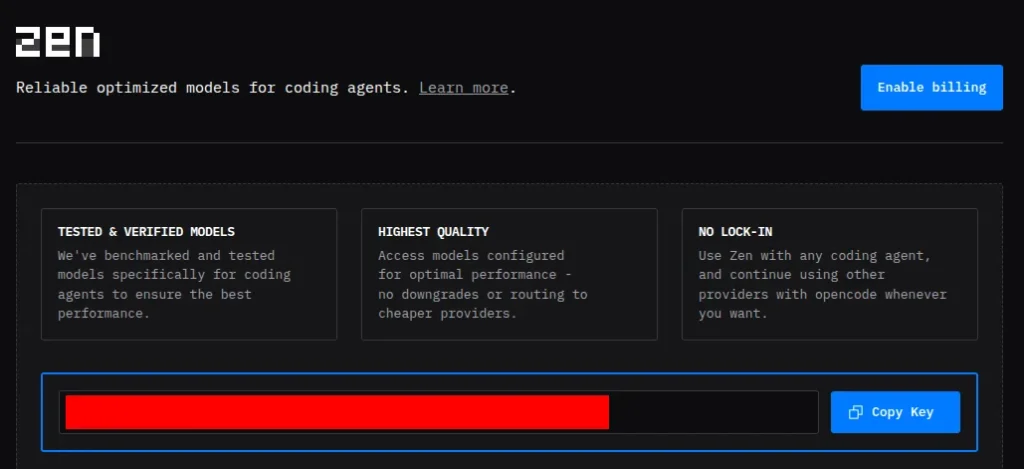
Next, run the following command in the terminal, select OpenCode Zen, and paste the API key:
opencode auth loginAfter adding the model, you must restart OpenCode if it was open.
Integrating Gemini into OpenCode
Integrating Google’s Gemini models into OpenCode provides access to one of the most powerful AIs, as well as free-to-use models. To access these models, you must log in to Google’s AI Studio platform and go to the dashboard to obtain an API key.
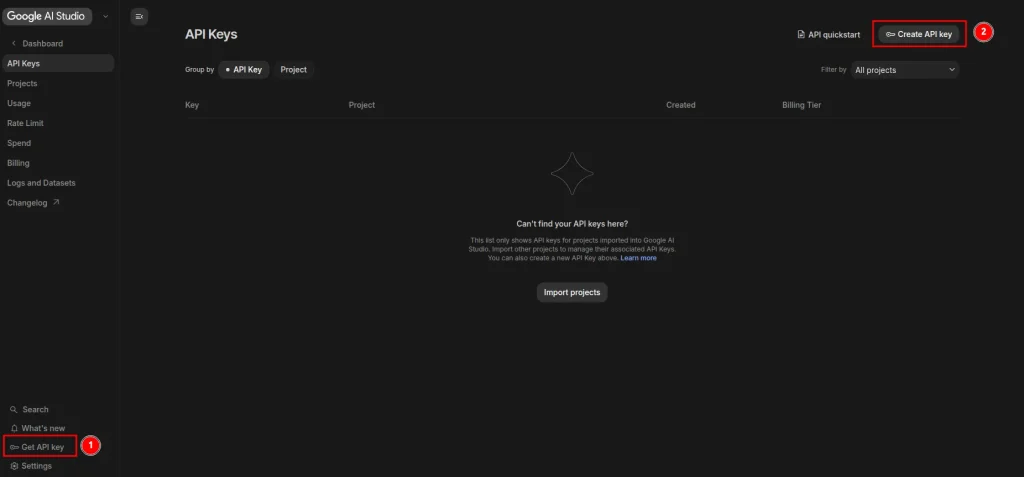
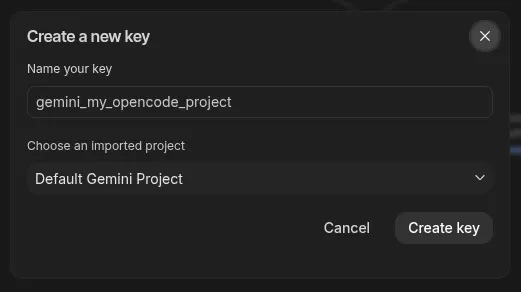
Once there, you must create a key, assign it an identifying name, and also select a Google Cloud project. If you do not want to use paid plans—and therefore do not need a billing account—you can use the default Gemini project, as shown in the following screenshot:
When you have obtained the API key, follow the same steps as with Zen: run the following command from the terminal, select Google as the provider, and paste the API key:
opencode auth login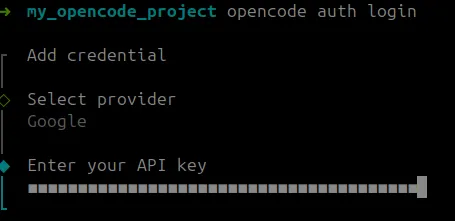
This enables access to the models from the UI after restarting OpenCode, if it was open:
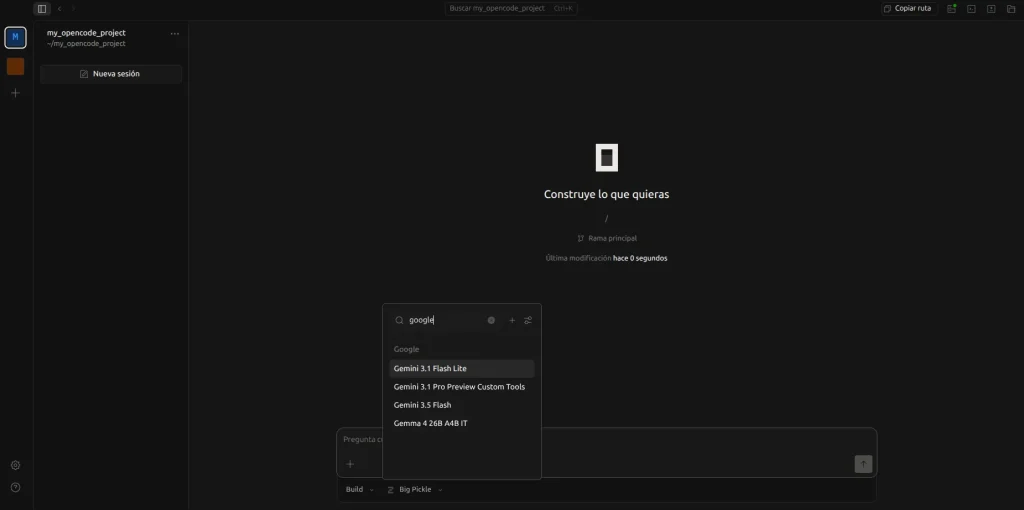
Local models with Ollama
Vendors and their APIs aren’t the only way to set up a model for OpenCode. If you have a powerful machine, you can choose to use a locally hosted model. This can save costs, especially if you have the infrastructure to host very large LLM models.
Installing and configuring Ollama
One way to connect OpenCode to local models is with Ollama. This tool can be installed as follows:
curl -fsSL https://ollama.com/install.sh | sh
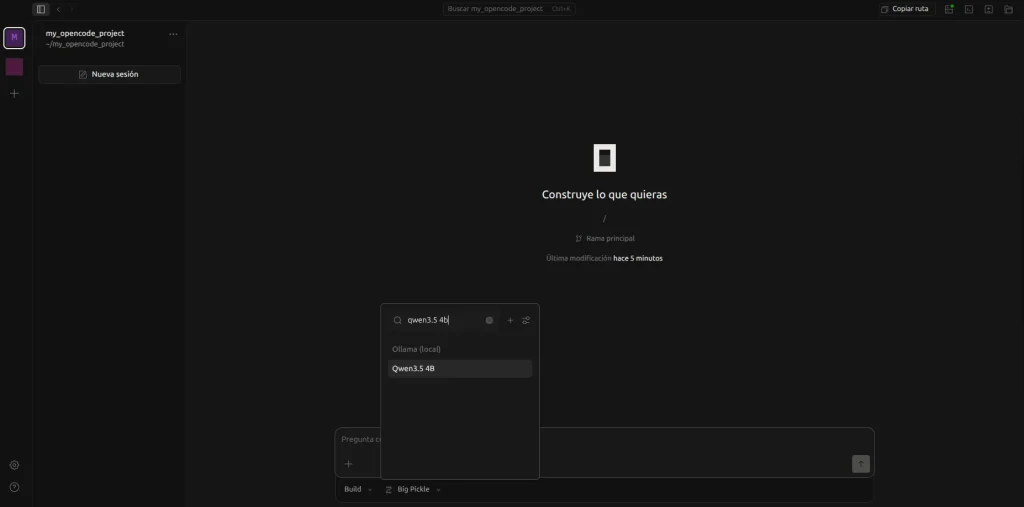
Configuring an Ollama model for use in OpenCode is not as straightforward as the other options. First, you must download the desired model. Ollama offers a large library of models from various providers, each with its own hardware requirements. In this example, we’ll start with the qwen3.5:4b model, which can be downloaded using the following command:
ollama pull qwen3.5:4bIf the model does not require any further configuration, it can be added to OpenCode by modifying the configuration file ~/.config/opencode/opencode.json:
{
  "$schema": "https://opencode.ai/config.json",
  "provider": {
    "ollama": {
      "npm": "@ai-sdk/openai-compatible",
      "name": "Ollama (local)",
      "options": {
        "baseURL": "http://localhost:11434/v1"
      },
      "models": {
        "qwen3.5:4b": {
          "name": "Qwen3.5 4B"
        }
      }
    }
  }
}
Depending on the model and the machine, you may need to adjust the maximum allowed context size. Ollama sets context limits based on your system’s VRAM capacity. These limits are in place to ensure that running a model does not require spilling to RAM (or disk) and that it runs smoothly and quickly. However, the lower limit for graphics cards with less than 24GB of VRAM restricts many systems used by average users to a 4k context. For testing with OpenCode, this context window size is not large enough.
To modify the context size, you must change the OLLAMA_CONTEXT_LENGTH environment variable. If the user launches the Ollama server manually, this can be done with the following command:
OLLAMA_CONTEXT_LENGTH=16384 ollama serveOn the other hand, if the user decides to run the server in the background using a service, the following line can be added to the /etc/systemd/system/ollama.service file within the [Service] block:
Environment="OLLAMA_CONTEXT_LENGTH=16384"And then, restart the service:
sudo systemctl daemon-reload
sudo systemctl restart ollama.service
Project configuration
The core behavior and architecture of the OpenCode agent in a project or repository are defined through the AGENTS.md configuration file. In this file, the user (or the agent itself) can define rules or instructions that will be passed to the agent’s context. Additionally, these files can be included in any subfolder of the project, allowing for hierarchical customisation of the agent.
To create an AGENTS.md file, simply write some operational rules in the Markdown file. There is no strict structure. If you are starting from an existing project, you can run the /init command within the agent session. In the following example, two Python code files have been created to move two entities randomly:
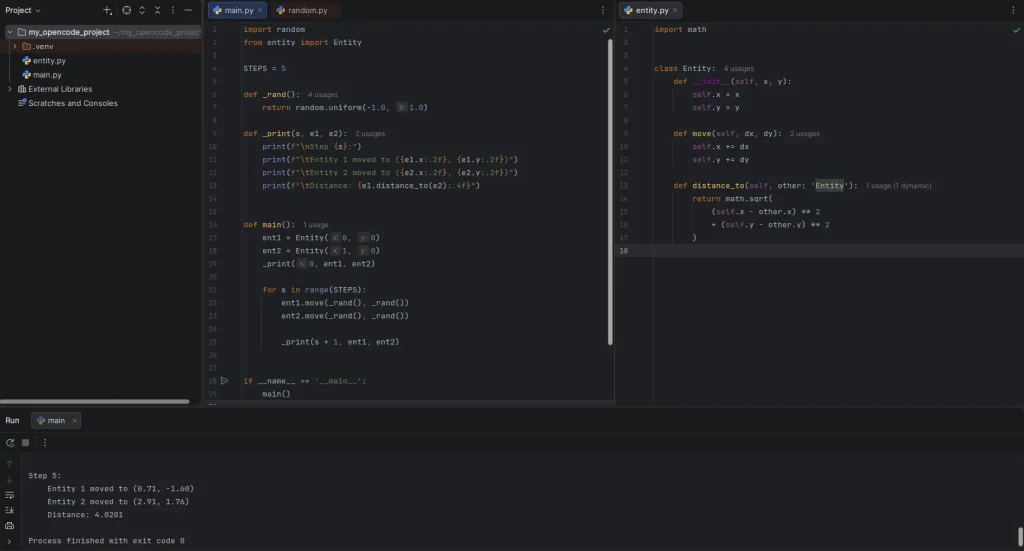
The following image shows the result of running the /init command. The agent has provided a brief summary of the code’s content. In future queries, this context will be included to facilitate the agent’s actions.
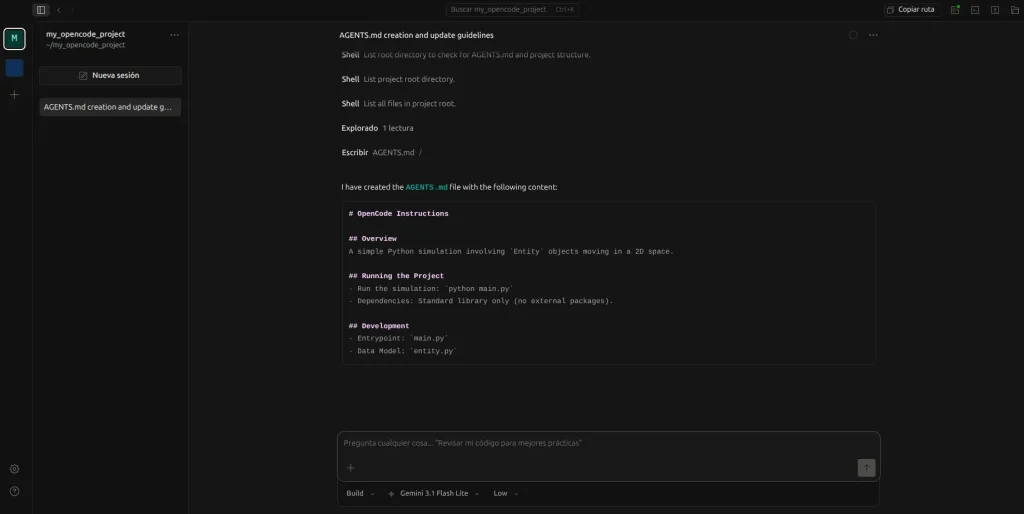
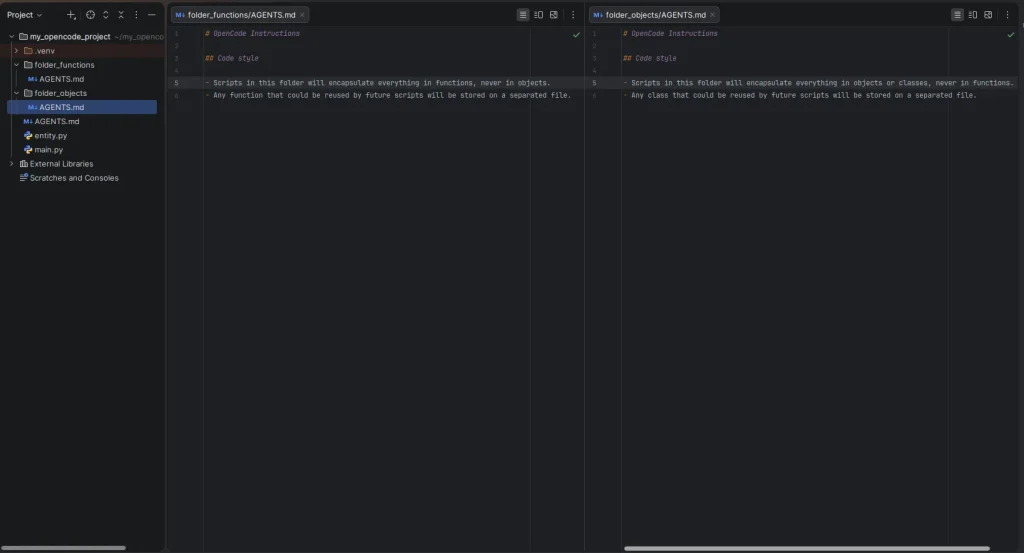
As mentioned earlier, these configuration files can be included in the project’s subfolders with different instructions. In the following example, two subfolders have been created with different instructions: in one, the coding style is functional, and in the other, it is object-oriented.
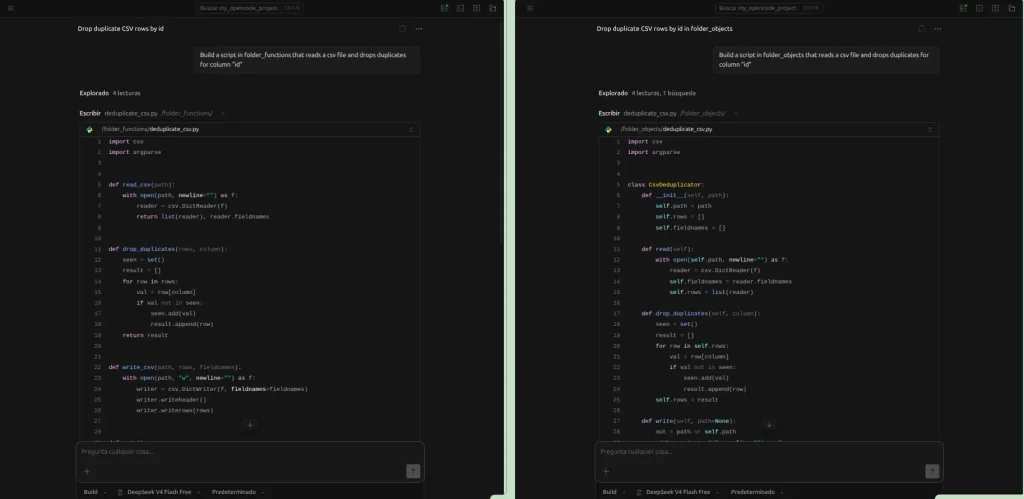
Two different sessions were set up in which the developer was asked to write code to read and deduplicate a CSV file, but in each session, he was instructed to save the code in a different folder. The result is more or less as expected. In the “functions” folder, he wrote functions, and in the “objects” folder, he wrote object-oriented code.
Configuring OpenCode Skills
OpenCode’s functionality can be significantly expanded by configuring skills. Skills are custom tools or functions that the agent can execute automatically or manually using the /skill_name command within a session. Configuring these skills allows the user to equip the agent with specialised capabilities, improving its efficiency and accuracy in niche or recurring tasks.
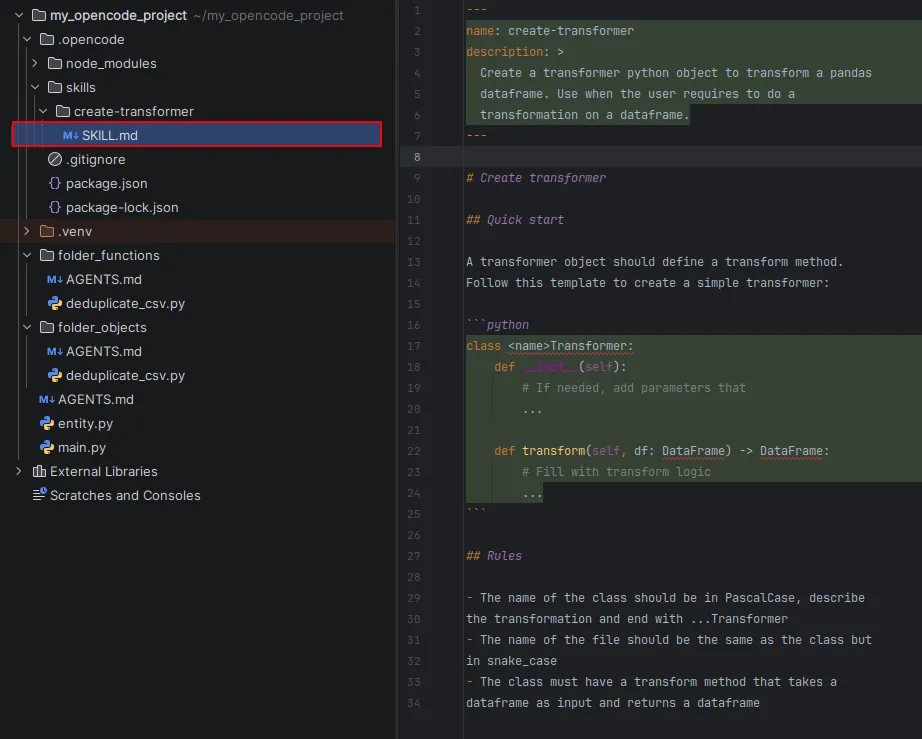
To configure a skill named <skill_name> at the project level, you must create a file at the path .opencode/skills/<skill_name>/SKILL.md. Just like AGENTS.md, you can also describe the skill you want directly to the agent, and it will attempt to create it. The SKILL.md file is a Markdown file that must begin with a metadata block in YAML format. This metadata must include the following required key-value pairs:
- name: the skill’s name, consisting of lowercase letters, numbers, and hyphens. It must match
<skill_name>as specified by the file path. - description: a summary of the skill that should explain what it does and when to use it.
From here on, you can write out the details in the body of the Markdown file. It’s recommended to use concise language that includes everything necessary without overwhelming the agent’s context. Some examples of skills include templates for the agent to use or code snippets to be executed.
In the following example, a `create-transformer` skill is created with a template for creating classes that transform data.
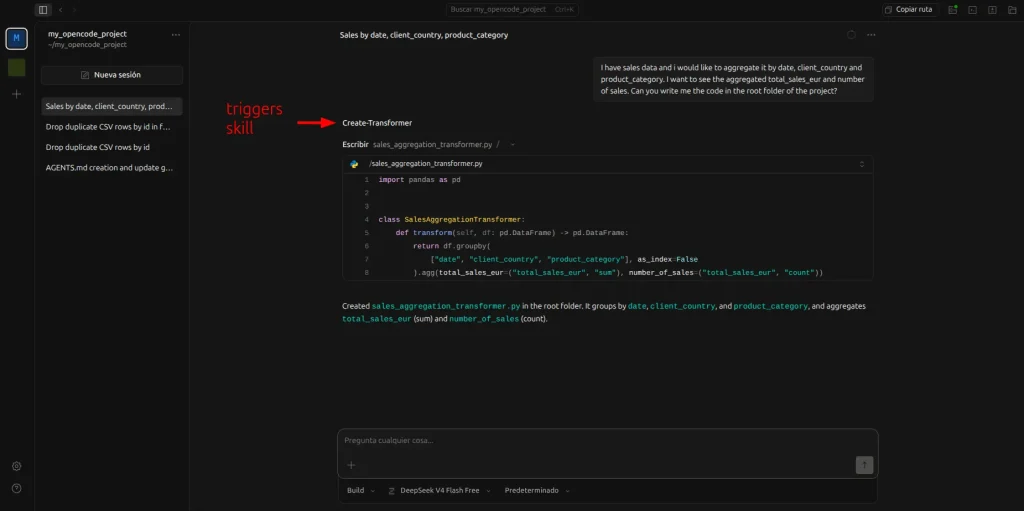
After restarting OpenCode to load the skills, the agent is asked to create a transformation using the following prompt:
I have sales data and i would like to aggregate it by date, client_country and product_category. I want to see the aggregated total_sales_eur and number of sales. Can you write me the code in the root folder of the project?Even though the agent didn’t mention the word “transform” or tell it to execute the skill, it was able to automatically detect that it should use the new skill:
Conclusion
OpenCode is an open-source agent designed to assist developers with code development and other daily tasks, running locally. This post has covered how this tool can integrate with multiple providers—such as Zen, Google, and Ollama—to provide access to various LLM models (some of which are available for free).
Next, we’ve seen how to configure OpenCode at the project level using the AGENTS.md file. In this file, you can define the rules and instructions that the agent will include in its context. Additionally, you can configure settings on a folder-by-folder basis to create more customised rules.
Finally, OpenCode’s functionality is significantly expanded by configuring skills. These are defined through the SKILL.md file and allow you to equip the agent with specialized capabilities to improve its effectiveness in specific or recurring tasks.
So much for today’s post. If you found it interesting, we encourage you to visit the Software category to see similar articles and to share it in networks with your contacts. See you soon!
