DevOps is a set of practices that aim to streamline the software development lifecycle by coordinating the development (Dev) and operations (Ops) departments. Teams with an integrated DevOps culture are able to continuously integrate and deliver software (CI/CD) by automating its compilation, testing and deployment.
Jenkins is an open source automation server that allows CI/CD pipelines to be defined. As an open source, Jenkins has a wide variety of plugins that allow to extend its utilities and interact more easily with other tools.
In this post, we describe the process of installing and configuring Jenkins so that it can interact with a repository on GitHub. Additionally, a job is created and configured in Jenkins that allows the GitHub user to automatically see if the unit tests of a branch in the repository have been executed correctly.
Installing Jenkins with Docker
Docker is a tool that allows us to deploy software inside containers. In the case of Jenkins, there is an official image (jenkins/jenkins:lts-jdk11) that allows you to easily deploy a Jenkins server. Later on, Python will be used later to create the tests. Therefore, we will create a Dockerfile to establish a new image based on the official one but with Python installed.
FROM jenkins/jenkins:lts-jdk11
USER root
RUN apt-get update -y
RUN apt-get install -y python3.9
To create an image named jenkins_build from the Dockerfile, use the command:
docker build -t "jenkins_build" .Finally, to run the container, the following command is used starting from the image created before:
docker run --rm \
  -p 8080:8080 \
  -p 50000:50000 \
  -v /path/to/jenkins_home:/var/jenkins_home \
  --name jenkins_demo \
  jenkins_build
The following is a step-by-step explanation of the above command:
- The
--rmoption causes the container to be deleted at the end of its execution. That allows this command to be used every time we want to run it. Alternatively, you can omit this option and relaunch the container withdocker start [container_name]. - The
-p 8080:8080option maps the local port 8080 to the container port 8080, which corresponds to the port of the web interface. - Likewise, the
-p 50000:50000option corresponds to the agent port. - The
-v /path/to/jenkins_home:/var/jenkins_homeoption creates or uses a volume. It associates a directory on your system to the/var/jenkins_homedirectory within the container. This option allows you to persist changes to a local directory. - The
--name jenkins_demooption gives the container a name.
Getting started
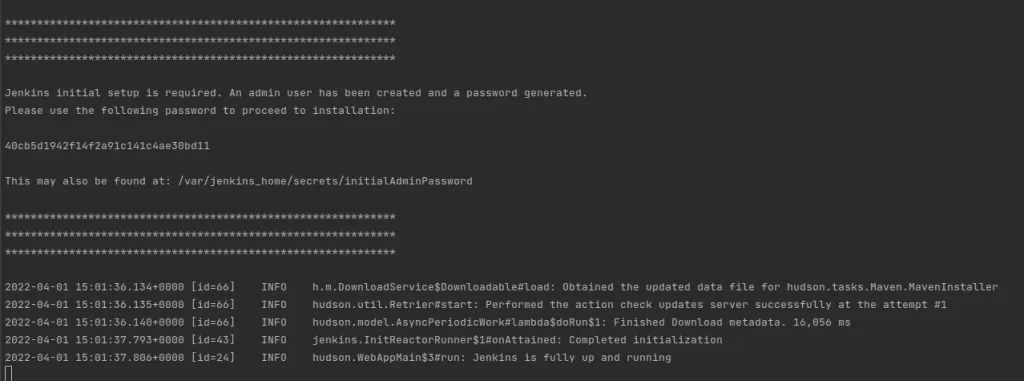
Once the installation is finished, a message containing the admin user password and another message announcing that the Jenkins server is ready for use will be displayed on the console:
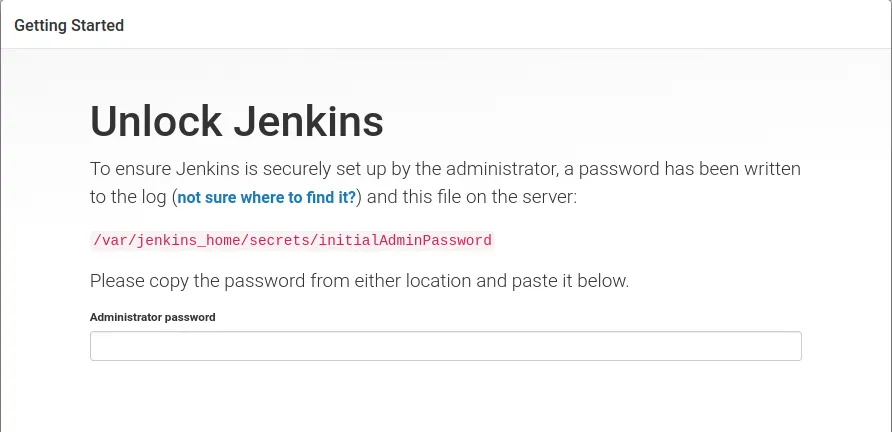
After startup, the Jenkins UI can be accessed via http://localhost:8080, where Jenkins will request that the admin user password be entered:
From here, Jenkins will guide the user to finish the installation and configuration of the server. Among the welcome options are the installation of recommended plugins, some of which will be used in the demonstration below.
Jenkins and GitHub Integration
In this section the job is created to illustrate a CI/CD process. We want the Jenkins server to be able to detect changes in a GitHub repository and, when this happens, run the unit tests defined in this repository. Finally, it is desired that the result of these tests can be consulted in the GitHub repository so that all team members can know the status of a commit, a branch or a pull request.
Repository configuration
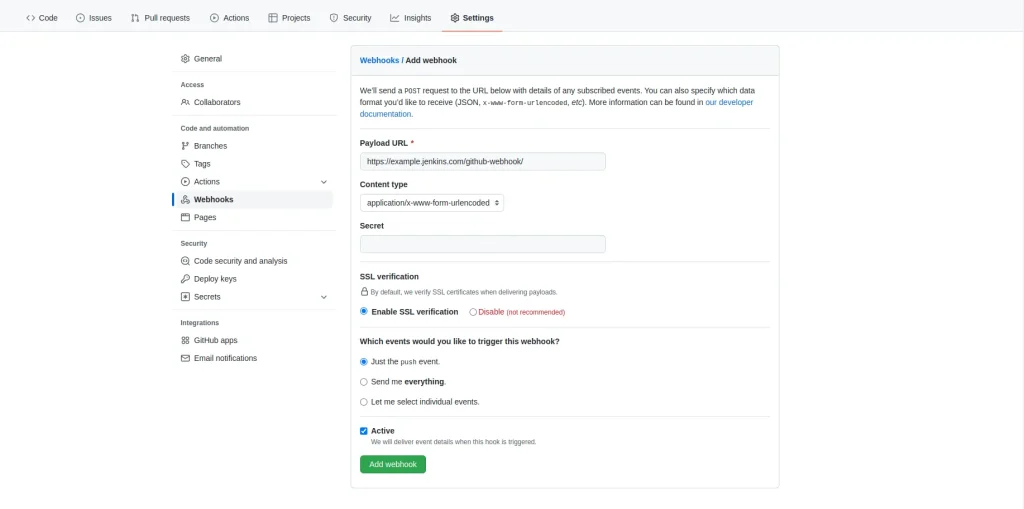
To begin with, the GitHub repository is configured to interact with Jenkins. First, a webhook is prepared. This allows GitHub to notify Jenkins that an event has occurred in the repository, such as a push to one of the branches. To do this, go to the repository configuration tab and, in the Webhooks section, add one. Once here, enter the IP address of the Jenkins server and add /github-webhook/ at the end.
If the installation process described in this post has been followed step by step, the Jenkins server will only be available on the local network. To keep the focus on the interaction between Jenkins and GitHub and as we are working on a test environment, we decided to use the ngrok tool to expose a local port (in this case 8080) to the internet.
Security and access
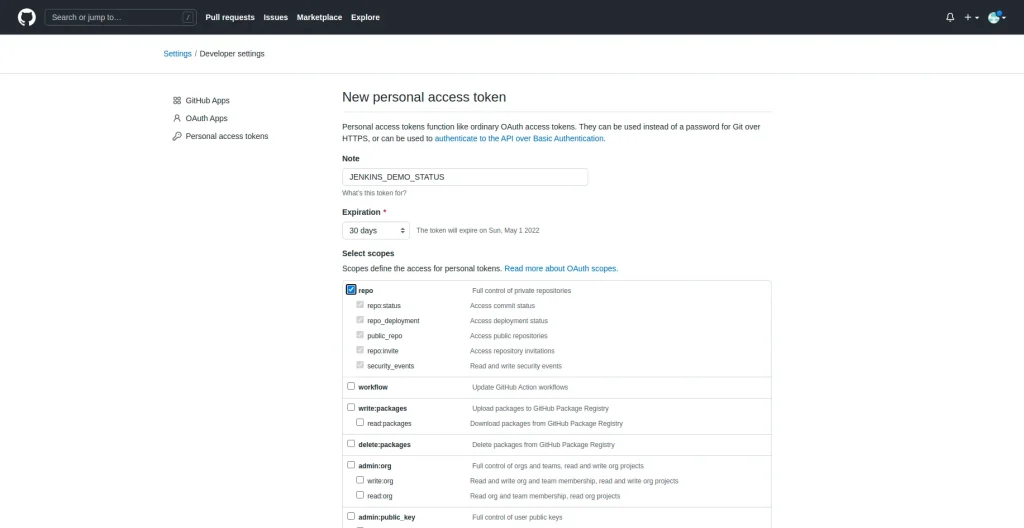
Next, a personal access token is generated so that Jenkins can report unit test results in a commit to GitHub. To do this, you need to access the GitHub account settings and go to the developer settings tab. In the personal access tokens section, a new token can be generated, which will be given control over the account’s private repositories (repo box).
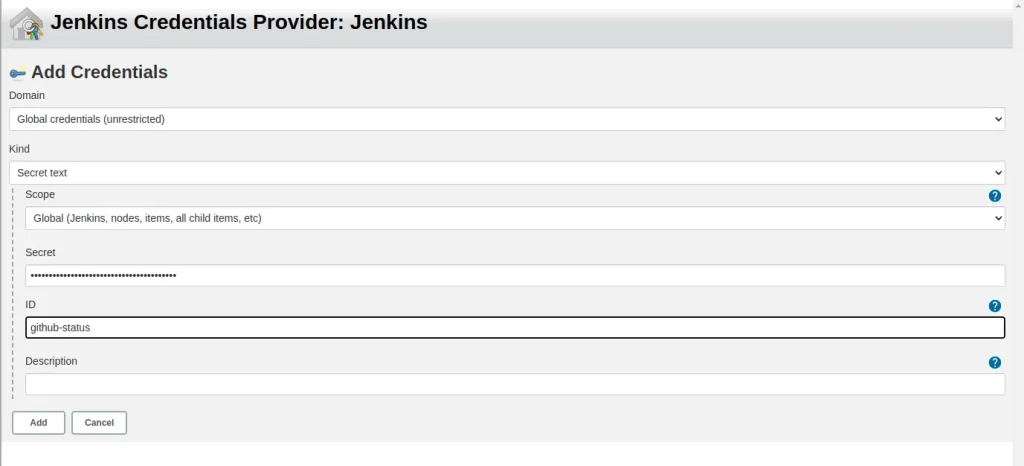
Once the token is generated, it must be entered into the Jenkins configuration. To do this, go to Manage Settings in the main dashboard and then to the system configuration. In the GitHub section, a new server can be added, where the Manage hooks checkbox should be checked:
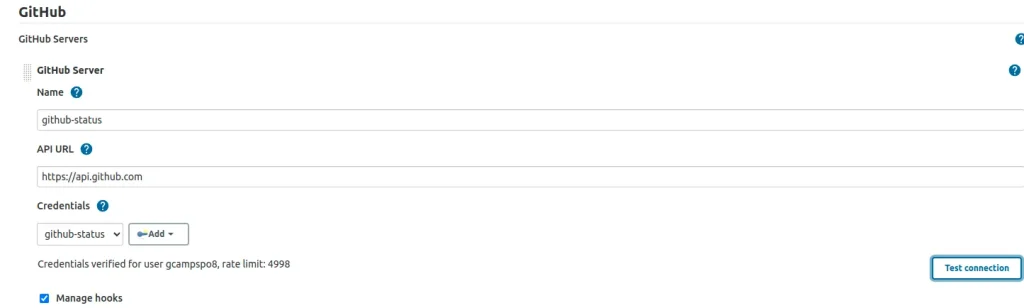
New Secret text credentials must be added and the Github token must be added to Secret.
Creation of the CI/CD pipeline
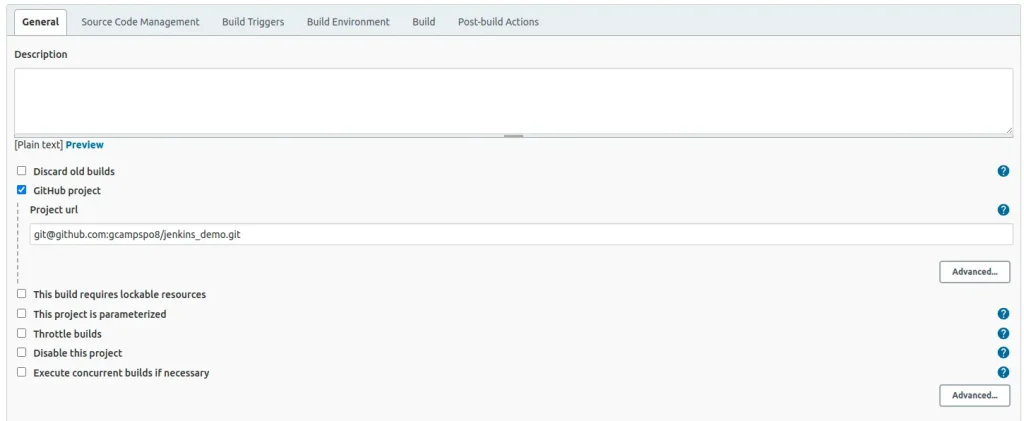
Then, create a job from the main dashboard and select the Freestyle project option. In the first section of the job configuration, select the GitHub project option, where the ssh url of the repository is added.
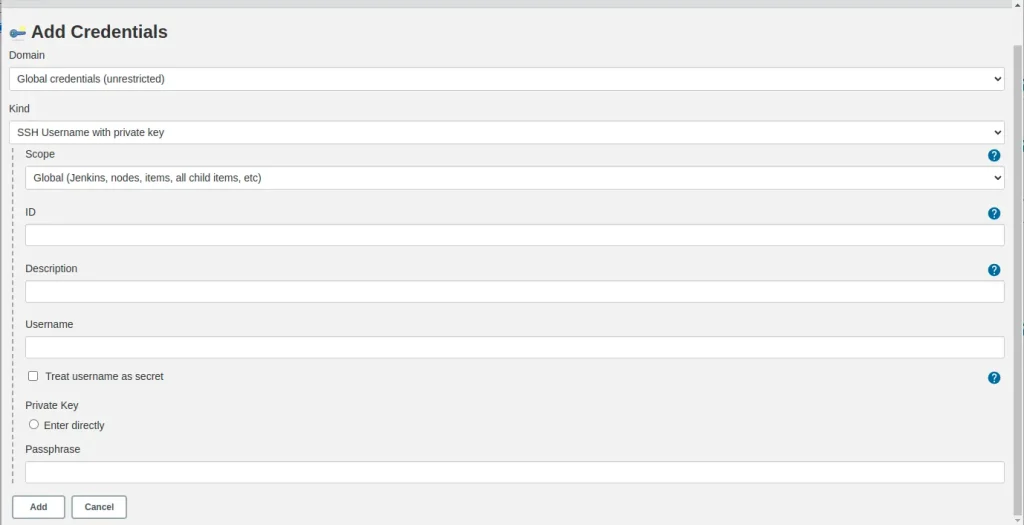
The same url is added in the Source code management section, where you will additionally have to add new credentials, but this time via ssh. This requires that you have generated a pair of public and private keys and uploaded the public one to GitHub. In case you do not have it configured, you can consult the GitHub documentation here. To configure Jenkins, select the SSH Username with private key option and fill in the user, private key and passphrase fields with their respective values.
Next, select the GitHub hook trigger for GITScm polling option so that Jenkins will run the job when it receives the webhook prompt. Then, you have to define what the job will do. First, the job will run the tests. To do this, in the Build section, a build step is added to allow a shell command to be executed. In this case, the repository contains 1 test that uses the unittest library, then the following command is used to find all the tests and execute them:
python3.9 -m unittest discoverFinally, the test result has to update the commit status in the repository. To do this, a Post-build action of type Set GitHub commit status (universal) is created and the option to use default messages and statuses in Status result is selected.
Job execution
Once the job and the interaction between the two platforms have been configured, it only remains to check the operation with different test results. To summarize, the operation should be as follows: first, a local commit is made and uploaded to the repository and Jenkins is notified. Then, Jenkins downloads the repository and performs the tests. Finally, the result of the tests is reported to GitHub, where the changes are marked as successful or failed.
First, a test is created that always fails, such as:
import unittest
class Test(unittest.TestCase):
def test_run(self):
expected = 42
actual = 314
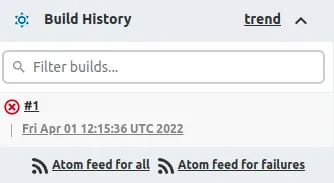
self.assertEqual(expected, actual)Accessing the job in Jenkins, you can see how build number 1 has failed in the left panel:
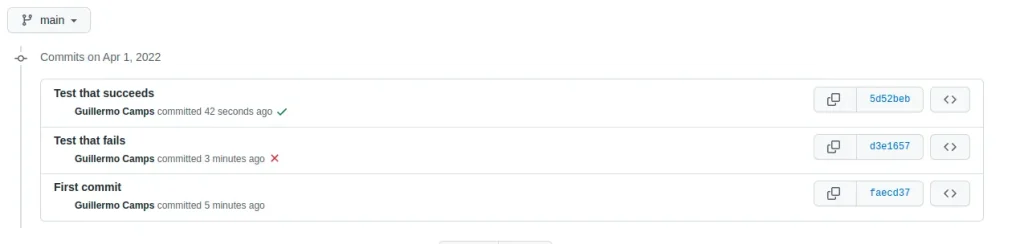
If you access the GitHub commits, you can see how the commit has been marked with an x:

Finally, the same process is performed with a test that never fails:
import unittest
class Test(unittest.TestCase):
def test_run(self):
expected = 42
actual = 42
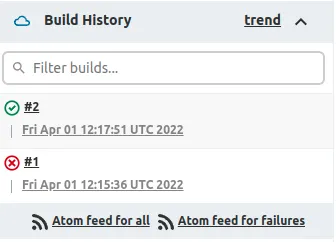
self.assertEqual(expected, actual)It is observed that in Jenkins the job has been executed correctly and that in Github the commit has been marked as successful.
Conclusion
In this post we have seen how to use Jenkins to create CI/CD pipelines and streamline the software development lifecycle. In a simple example, we have seen how to define the interaction between GitHub and Jenkins to run a job when pushing to the repository and update the commit in question.
Jenkins allows to expand the possibilities of the pipelines thanks to the plugins it offers. For example, in more complex cases, you can use Pipeline plugins to define pipelines programmatically through Jenkinsfile files in DSL language.
If you found this article interesting, we encourage you to visit the Software category to see more posts like this one and to share it in networks with all your contacts. Don’t forget to mention us (@DamavisStudio) to let us know what you think.
