What is MongoDB?
MongoDB is an open source NOSQL database. This means that data does not necessarily have to follow a schema. All data is stored in a JSON similar document format known as BSON or Binary JSON and will have a format similar to the following:
{
  _id: "123",
  name: "Pepe",
  email: "pepe@gmail.com",
}
This format gives an ideal flexibility to make MongoDB a very relevant candidate for Big Data projects. This idea is supported by the fact that MongoDB was already designed as a distributed database, which means that high availability and horizontal scalability are already present and can be easily leveraged.
To imagine the power of MongoDB we can think of a case like storing survey results. These can have questions nested in other questions or have a variable number of questions in each type of survey. These cases are not trivial in a SQL database, but they can be modeled as lists of answers in MongoDB.
Installing MongoDB
MongoDB provides an already managed cluster called MongoDB Atlas, it is also possible to perform a manual installation of MongoDB, the main ways of installation are described below.
Docker Installation
Docker is an open source project that allows you to deploy applications inside virtual, self-sufficient containers.
After installing Docker and Docker Compose, we can create a template called mongo-docker.yml:
version: "3.8"
services:
  mongo:
    image: mongo:5.0
    container_name: mongo
    environment:
        - MONGO_INITDB_ROOT_USERNAME=admin
        - MONGO_INITDB_ROOT_PASSWORD=pass
    restart: unless-stopped
    ports:
      - "27017:27017"
    volumes:
      - ./database/db:/data/db
      - ./database/dev.archive:/Databases/dev.archive
      - ./database/production:/Databases/production
  mongo-express:
    image: mongo-express
    container_name: mexpress
    environment:
      - ME_CONFIG_MONGODB_ADMINUSERNAME=admin
      - ME_CONFIG_MONGODB_ADMINPASSWORD=pass
      - ME_CONFIG_MONGODB_URL=mongodb://admin:pass@mongo:27017/?authSource=admin
      - ME_CONFIG_BASICAUTH_USERNAME=mexpress
      - ME_CONFIG_BASICAUTH_PASSWORD=mexpress
    links:
      - mongo
    restart: unless-stopped
    ports:
      - "8081:8081"
With this template we define an instance of MongoDB and an instance of Mongo Express, an administration panel that allows you to interact with the database. To run the applications we must enter the directory containing the template and execute the command:
docker-compose -f mongo-docker.yml upThis will download and install MongoDB version 4.2 and Mongo Express the first time the command is run, so it will take a little longer. Note that the MongoDB cluster will use the user “admin” and password “pass” for authentication. We will now be able to access the MongoDB cluster through any database client on port 27017 or the web portal at http://localhost:8081 with the username and password “mexpress”. To shut down the cluster, we can use the command:
docker-compose -f mongo-docker.yml downLocal installation
MongoDB is available on all major operating systems and provides two main versions, a subscription-based enterprise version and a community version, which is free and will be used.
Installation can be done with the package manager of each operating system and a detailed guide can be found in the official documentation.
Using a cluster in the cloud
You can use instances hosted by services such as Mongo Atlas which will generally charge fees for storage and data transferred. As a general rule, these services will provide an administration panel or tools for managing the MongoDB cluster. In the case of Mongo Atlas, the main tool will be the Atlas CLI or its web interface. In addition, it provides a free cluster to work with the technology.
Interacting with a Mongo cluster
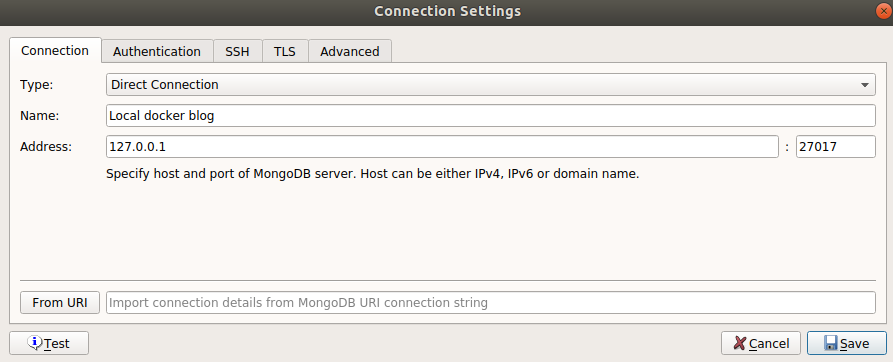
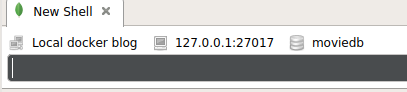
There are several clients with a graphical interface, such as Mongo Compass and Studio 3T (also known as Robo 3T). Throughout this article, we will use Studio 3T in its free version to interact with MongoDB. We can connect to the cluster with the following configuration (We will use the cluster built on docker):
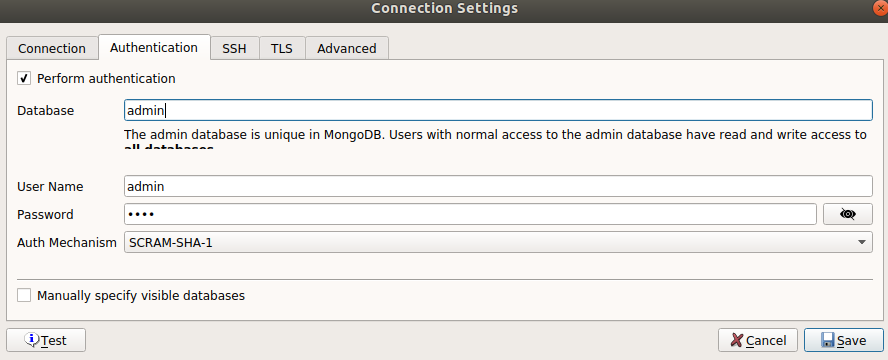
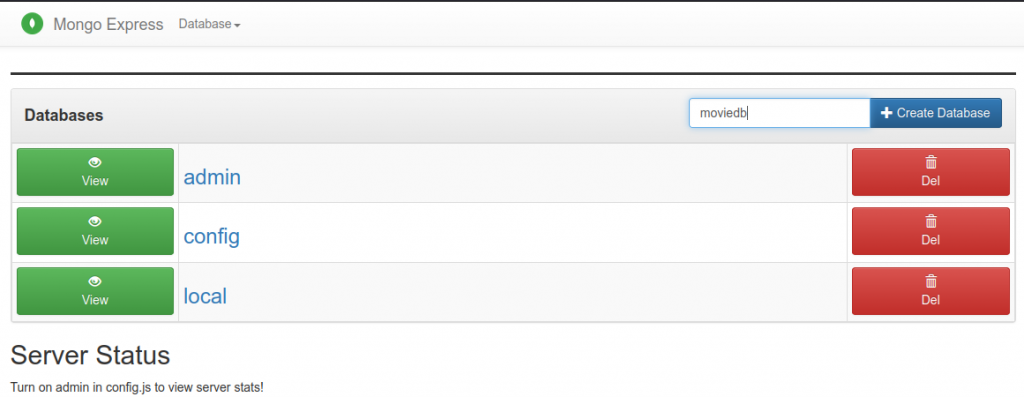
In this case, we can identify ourselves as the administrator user, as we have not created any other user. If we would like to do so, we can follow these instructions for user creation. First, we will connect to the web portal at http://localhost:8081 and create a new database:
After clicking the create database button, we can open Robo 3T or the chosen client, select the new database and right click to open a Mongo Shell instance that will work on this database.
We are going to create a small collection (equivalent to a table in SQL) with movie information to work with MongoDB’s elementary operations. This statement is not necessary, as MongoDB will also create the collection when you insert data into it for the first time, but it will allow you to specify options for more control:
db.createCollection(‘movies')We can insert records using the insertOne or insertMany function as follows:
db.movies.insertMany([
   {
  	title: 'Titanic',
  	year: 1997,
  	genres: [ 'Drama', 'Romance' ],
  	rated: 'PG-13',
  	languages: [ 'English', 'French', 'German', 'Swedish', 'Italian', 'Russian', 'Spanish' ],
  	released: ISODate("1997-12-19T00:00:00.000Z"),
  	awards: {
     	wins: 127,
     	nominations: 63,
     	text: 'Won 11 Oscars. Another 116 wins & 63 nominations.'
  	},
  	cast: [ 'Leonardo DiCaprio', 'Kate Winslet', 'Billy Zane', 'Kathy Bates' ],
  	directors: [ 'James Cameron' ]
   },
   {
  	title: 'Casablanca',
  	genres: [ 'Drama', 'Romance', 'War' ],
  	rated: 'PG',
  	cast: [ 'Humphrey Bogart', 'Ingrid Bergman', 'Paul Henreid', 'Claude Rains' ],
  	languages: [ 'English', 'French', 'German', 'Italian' ],
  	released: ISODate("1943-01-23T00:00:00.000Z"),
  	directors: [ 'Michael Curtiz' ],
  	awards: {
     	wins: 9,
     	nominations: 6,
     	text: 'Won 3 Oscars. Another 6 wins & 6 nominations.'
  	},
  	lastupdated: '2015-09-04 00:22:54.600000000',
  	year: 1942
   }
])
To obtain the data from this collection, we can use the find function on the collection. This function allows us to specify a filter to apply, in a first instance, we can leave it empty to collect all the data from the collection:
db.movies.find({})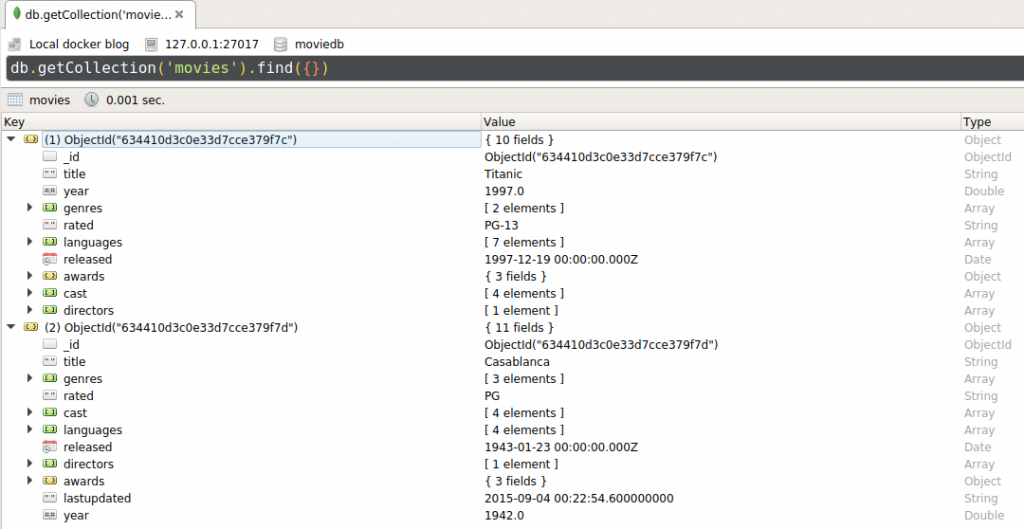
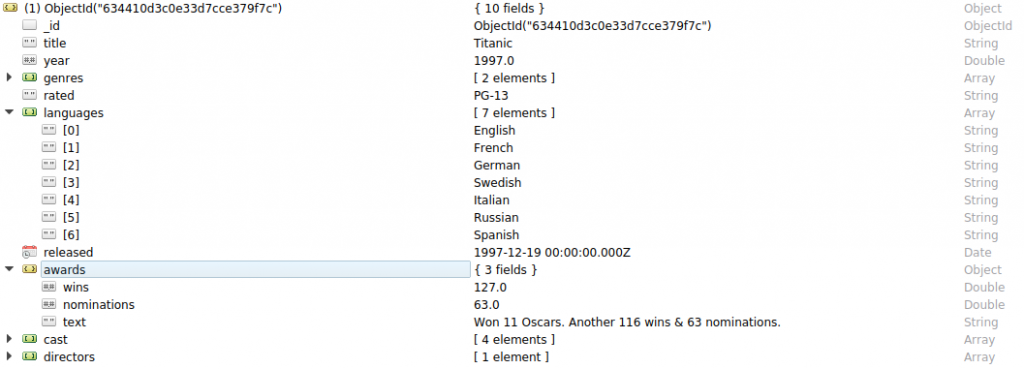
Looking at the result of this operation, we can see that a new _id field has appeared. This field is automatically generated by MongoDB and contains the following information:
- A 4-byte timestamp, representing the time the object was created.
- A 5-byte random value generated according to the machine and process
- A 3-byte incremental counter, which is initialized to a random value.
MongoDB guarantees that this field is unique, will be used by default as a primary key and will be indexed. If required, we can set a custom value for this field but we must ensure that this value is unique for all documents in the collection.
We can apply filters as complex as we wish, let’s search for all films that are available in English and have won more than 100 awards:
db.movies.find({
		$and: [
	          { "languages": "English" },
	          { "awards.wins": { $gt: 100 } }
        ]
})
In addition, we can indicate whether we want to see all the fields in the results or not, let’s say we only want to find out the title of the films in the previous case:
db.movies.find({
		$and: [
	          { "languages": "English" },
	          { "awards.wins": { $gt: 100 } }
        ]
}, { _id: 0, title: 1 } )
With the following result:

Conclusion
We have seen the surface of MongoDB’s functionalities, however, there are still many points to discuss: the creation of indexes, the interaction with different programming languages… In addition to the possibilities when making requests to the collections opened by aggregation pipelines, which you can continue investigating in a previous post about Aggregation Pipelines in MongoDB.
In future articles, we will discuss the interaction of MongoDB with languages such as Scala or Python, as well as alternatives to this technology.
If you found this post interesting, we recommend you to visit the Software category and to share it with your contacts so they can also read it and give their opinion. See you in networks!
