
Since our Pentaho PDI plugin for Apache Airflow release, we have seen an industry shift towards the usage of Apache Hop for data processing.
What is Apache Hop?
Apache Hop started (late 2019) as a fork of Kettle PDI, is a piece of software that specializes in ETLs (Extraction, Transform, Load) through visuals instead of requiring programming skills.
This focus on visuals allows any kind of person to develop ETLs in an easy and understandable way.
What is Apache Airflow?
Apache Airflow is an open source workflow management platform for data engineering pipelines.
This is done through what is known as Directed Acyclic Graphs (DAGs) to control the workflow orchestration. Both tasks and dependencies are defined in Python and their scheduling and execution are controlled by Airflow.
Apache Hop’s problem and solution
The main problem with Apache Hop is that it does not possess a way to orchestrate its workflows and pipelines. But here is where Apache Airflow brings a solution to this.
Apache Hop has implemented a way to execute its workflows and pipelines by using Airflow’s DockerOperator. This solution is on the Apache Hop roadmap, but is not yet fully documented.
While Apache Hop finishes its official docker oriented version, we at Damavis have implemented a plugin to orchestrate workflows and pipelines that uses the Apache Hop Server API.
The plugin
This airflow-hop-plugin integrates Airflow and Hop to allow Data Engineers to orchestrate their tasks.
Below we explain how it works and how you can start taking advantage of it.
How does the plugin work
The plugin uses the REST API of Apache Hop to execute pipelines and workflows within a Hop Server. Due to this, Apache Airflow can track the status of the task, their logs and their total running time.
Prerequisites
In order to ensure the correct usage of the plugin there are a few prerequisites that must be met:
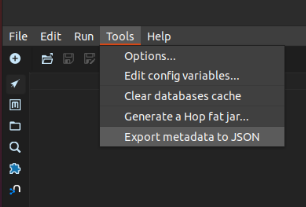
- You must generate a JSON file containing the project’s metadata. To do so just select the Tools option, then “Export metadata to JSON” and make sure that the created file is named “metadata.json”.
- Apache Hop home directory structure. Due to some technical limitations the Hop home directory must have a certain structure to make sure that the plugin knows where to find the necessary information to generate the calls.
hop # This is the hop home directory
├── ...
├── config
│   ├── hop-config.json
│   ├── example_environment.json # This is where you should
│   │						save your environment files
│   ├── metadata
│   │   └── ...
│   └── projects
│       ├── ...
│       └── example_project # This is how your project's
│           │			directory should look
│           ├── metadata.json
│           ├── metadata
│           │   └── ...
│           ├── example_directory
│           │   └── example_workflow.hwl
│           └── example_pipeline.hpl
├── ...
Installation
This plugin installation is really easy, you just need to execute the following command to install a python package. Please remember that to use it properly you will also need to install it in your Airflow environment.
pip install airflow-hop-pluginConfiguration
In order to fully set up the plugin, a new Airflow connection must be created. This can be done from the Airflow Webserver.
From the home page, click on Admin and then Connections, then click the Add button and fill the following fields with their respective values:
- Connection ID: ‘hop_default’
- Connection Type: HTTP
- Host: Name of the Apache Hop server
- Port: Apache Hop server Port
- Login: Apache Hop server Username
- Password: Apache Hop server password
- Extra: {“hop_home”: “/path/to/hop-home/”}
Once done, you can start developing Airflow DAGs to run Apache Hop’s tasks.
Example DAG
from airflow_hop.operators import HopPipelineOperator
from airflow_hop.operators import HopWorkflowOperator

# ... #

with DAG('sample_dag', start_date=datetime(2022,7,26),
        schedule_interval='@daily', catchup=False) as dag:

    # Define a pipeline
    first_pipe = HopPipelineOperator(
        task_id='first_pipe',
        pipeline='pipelines/first_pipeline.hpl',
        pipe_config='remote hop server',
        project_name='default',
        log_level='Basic')

    # Define a pipeline with parameters
    second_pipe = HopPipelineOperator(
        task_id='second_pipe',
        pipeline='pipelines/second_pipeline.hpl',
        pipe_config='remote hop server',
        project_name='default',
        log_level='Basic',
        params={'DATE':'{{ ds }}'}) # Date in yyyy-mm-dd format

    # Define a workflow with parameters
    work_test = HopWorkflowOperator(
        task_id='work_test',
        workflow='workflows/workflow_example.hwf',
        project_name='default',
        log_level='Basic',
        params={'DATE':'{{ ds }}'}) # Date in yyyy-mm-dd format

    first_pipe >> second_pipe >> work_test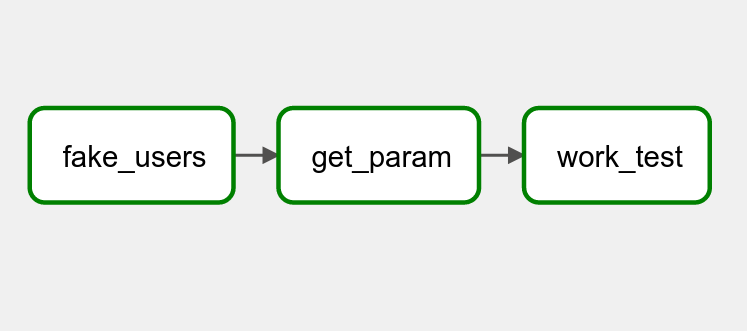
Conclusion
In this way, you will be able to orchestrate your batch data flows created in Apache Hop from Airflow.
Here are some links in case you want to know more about us, about the project or to contribute:
If you found this article interesting, we encourage you to visit the Data Engineering and Software categories for other similar posts and to share it on networks. See you soon!
