
The growing demand for applications and services has created a great need to more efficiently manage the APIs that communicate them. To meet this need, Apache APISIX is a high-performance, scalable, open source API management platform that acts as a gateway to manage, secure and optimise API traffic. It provides features such as monitoring, load balancing, dynamic upstream, caching, canary release, circuit breaking, authentication and observability.
To manage APISIX API traffic, APISIX relies on NGINX (via OpenResty), which is a web server, reverse proxy and load balancer known for its high performance and efficiency in managing concurrent connections. On the other hand, it provides the infrastructure to process the requests and rules configured in APISIX. In addition, APISIX uses etcd, which is a highly available and consistent distributed database, which is essential for configuration changes to be reflected in real time without the need to restart the gateway.
APISIX main elements
- The main component of APISIX is the Gateway, which is responsible for routing API traffic between clients and backend services. To do so, it receives and processes requests according to routing rules and sends the response. In addition, it applies the security and traffic control policies defined by the plugins.
- This technology defines routes, which are a set of rules that define how requests are composed, mainly with a URL that identifies it and the destination of the request. These routes can include query parameters and headers, and can be configured to handle different HTTP methods, such as GET, POST, PUT, DELETE.
- A service represents the backend destination to which requests will be sent once they have passed through the routes. In this, elements such as the URL of the service and the protocol can be specified, and will be used by routes to redirect traffic to the backend service it represents.
- Upstreams are groups of backend instances that handle requests and are used as load balancers between several instances of a service.
- To extend its functionality, APISIX employs plugins as additional modules, with which it can satisfy needs such as authentication management, rate limiting, authorisation, request or response handling and data logging.
Advantages of using APISIX
- It has a dashboard to facilitate the configuration of routes, services, upstreams and plugins for users. However, it is only available up to version 3.0. The decision to discontinue the dashboard in later versions is based on the need to focus resources on improving the performance and scalability of the gateway, the evolution of external management tools and the preference for a modular and flexible architecture.
- You can create custom plugins to tailor the gateway to your specific cases. Although Lua is the most widely used and natively supported language for plugin development in APISIX, plugins can be written in JavaScript via WASM and in Go using the APISIX Go Plugin Runner.
- It has a configuration controller, which is a component that handles and synchronises the configuration of the gateway, allowing routes, services and plugins to be configured without the need to restart the gateway.
- It sends log data to monitor and record traffic. This can also be useful for debugging in case of errors in the configuration of any element.
Installing APISIX with Docker
- Clone the repository:
git clone https://github.com/apache/apisix-docker.git - Navigate to the example folder, which has the deployment configuration:
cd apisix-docker/example - Start the services defined in docker-compose.yaml:
docker-compose up -p post_apisix
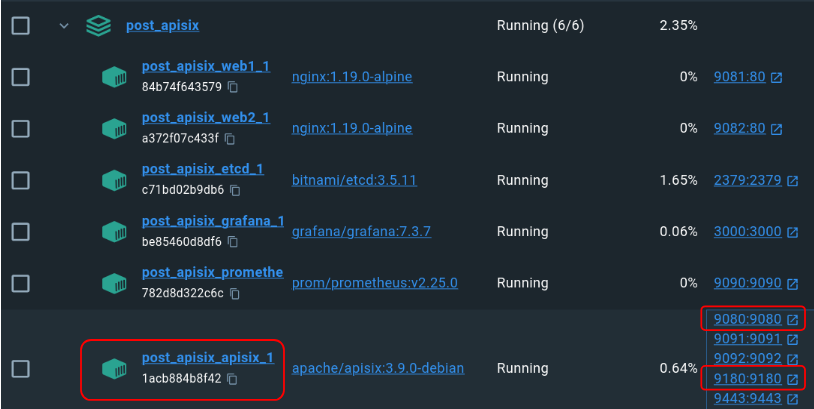
When the process finishes, we can see that we have six containers running. For this post, we will focus on the post_apisix_apisix_1 container, as it is the one we are going to use to create the elements. In it, we find port 9180, which will be used to configure the resources, and port 9080, which will be used to make the requests from the console.
Configuring APISIX with Auth0
Next, we will see how to configure the authentication plugin openid-connect to perform a complete APISIX use case. Here, we are going to authenticate with Auth0 in two ways: the first one will be on the web using the user’s credentials (method for individuals) and the second one will be requesting a token through the console using the client’s credentials (method for applications and services). First, we have to create an application in Auth0 as follows:
- Sign up for Auth0.
- Navigate to Applications > APIs and select the Create API button and create it.
- In the configuration of the created API, navigate to Machine To Machine Applications and make sure the Authorized option is enabled.
- Navigate to Applications > ‘{your_application (Test Application)}’ and add ‘http://localhost:9080/anything/callback’ to the Allowed Callback URLs field. Next, scroll down to Advanced Settings > Grand Types and enable the Authorization Code and Client Credentials options.
- Scroll to the top and copy the Domain, Client ID and Client Secret parameters for the next steps.
User authentication
Let’s create a route with the openid-connect plugin, to forward client requests to the httpbin.org website, which is a very simple public web service designed to help developers and testers test and debug HTTP requests. To do this, copy the following schema and change the Domain, Client ID and Client Secret parameters to those of your application. Note that we use port 9180 in the configuration, as discussed above, and that we also define the redirect url, which makes sure that users and search engines always get to the correct content, even if URLs change or resources are moved.
The /anything/‘{anything_anything}’ path in httpbin.org returns anything passed in the request data in JSON type, such as methods, arguments and headers.
curl -i "http://127.0.0.1:9180/apisix/admin/routes" -H "X-API-KEY: edd1c9f034335f136f87ad84b625c8f1" -X PUT -d '
{
"id": "auth-with-oidc",
"uri":"/anything/*",
"plugins": {
"openid-connect": {
"client_id": "m5bTMKvbRqn7JklTjIEZsO0saVLvIAoV",
"client_secret": "YKHDG4_oBE7XbciMsCh0sMO1IjgHK9ZPZcunlfLQfGbNmTyuZVY6YXv5lgbMFbKu",
"discovery": "'{auth0_domain}'",
"scope": "openid profile",
"redirect_uri": "http://localhost:9080/anything/callback"
}
},
"upstream":{
"type":"roundrobin",
"nodes":{
httpbin.org:80":1
}
}
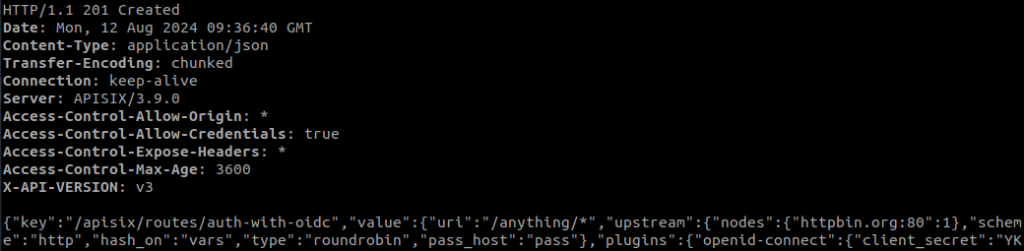
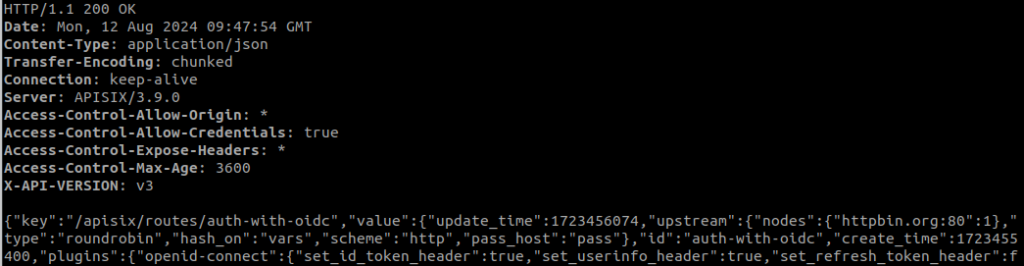
}'This is the result it should give us after creating the complete route:
Now that we have the route configured, we make the request to the following address:
http://localhost:9080/anything/get
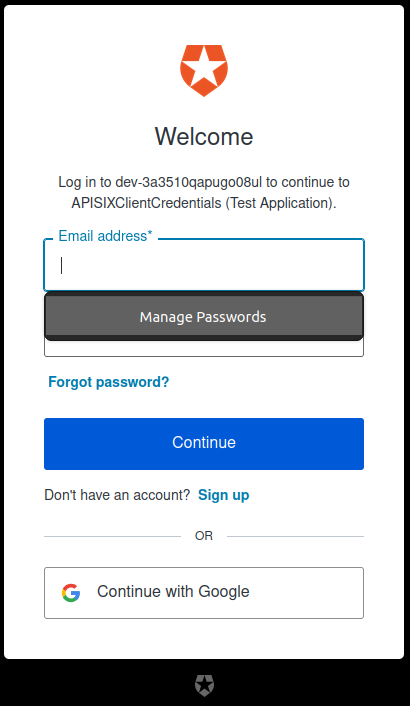
The Auth0 login will appear:
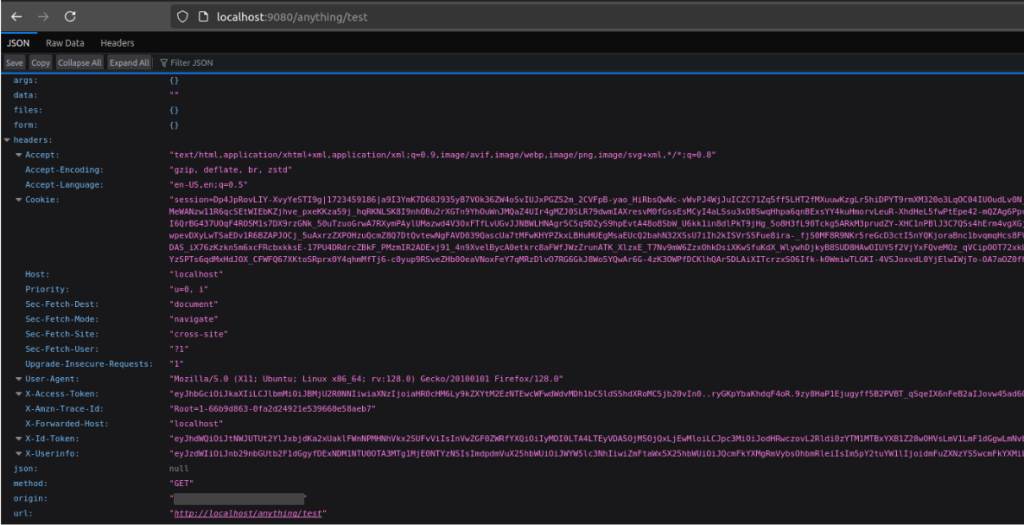
Upon successful authentication, a web JSON similar to the following should appear:
Authentication with client credentials
Another way to authenticate is by using the client’s credentials to obtain a JWT access token. To do this, we have to enable two more parameters in the above path configuration:
curl -i "http://127.0.0.1:9180/apisix/admin/routes" -H "X-API-KEY: edd1c9f034335f136f87ad84b625c8f1" -X PUT -d '
{
    "id": "auth-with-oidc",
    "uri":"/anything/*",
    "plugins": {
            "openid-connect": {
                    "client_id": "m5bTMKvbRqn7JklTjIEZsO0saVLvIAoV",
                    "client_secret": "YKHDG4_oBE7XbciMsCh0sMO1IjgHK9ZPZcunlfLQfGbNmTyuZVY6YXv5lgbMFbKu",
                    "discovery": "'{auth0_domain}'",
                    "scope": "openid profile",
                    "redirect_uri": "http://localhost:9080/anything/callback",
                    "bearer_only": true,
                    "use_jwks": true
             }
    },
    "upstream":{
            "type":"roundrobin",
            "nodes":{
                    httpbin.org:80":1
             }
    }
}'
Again, if we have not left any quotation marks unclosed or forgotten any commas, it should give us the following result.
Now that we have the configuration done, we are going to request the access token, using the parameters audience (Auth0 > APIs > copy ‘Api audience’), client_id, client_secret and grand_type.
curl -i "'{auth0_domain}'" -X POST \
-H 'content-type: application/json' \
-d '{
        "client_id":"m5bTMKvbRqn7JklTjIEZsO0saVLvIAoV",
        "client_secret":"YKHDG4_oBE7XbciMsCh0sMO1IjgHK9ZPZcunlfLQfGbNmTyuZVY6YXv5lgbMFbKu",
        "audience":"https://clientcredentials.com",
        "grant_type":"client_credentials"
}'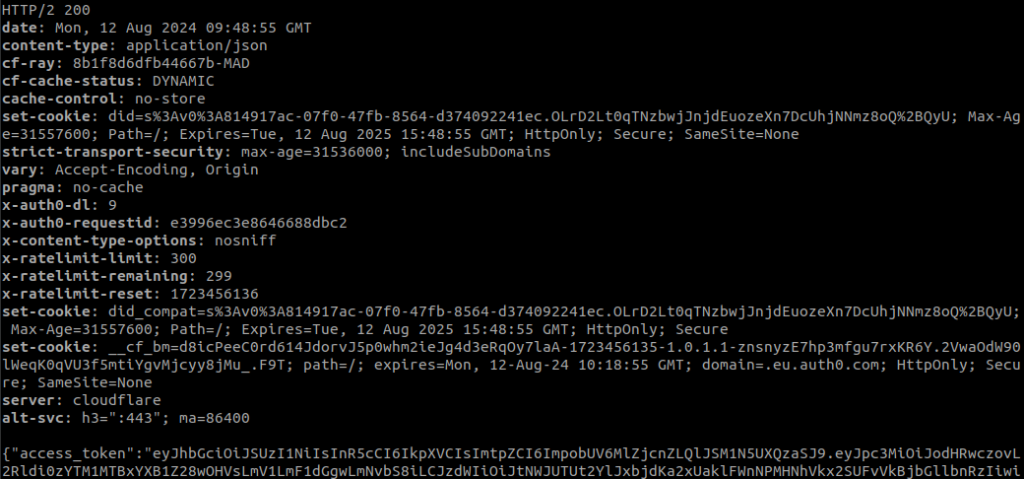
The token obtained is copied and pasted into the following command to access the resource:
curl -i "http://127.0.0.1:9080/anything/test" -H "Authorization: Bearer '{token_ey_obtained}'"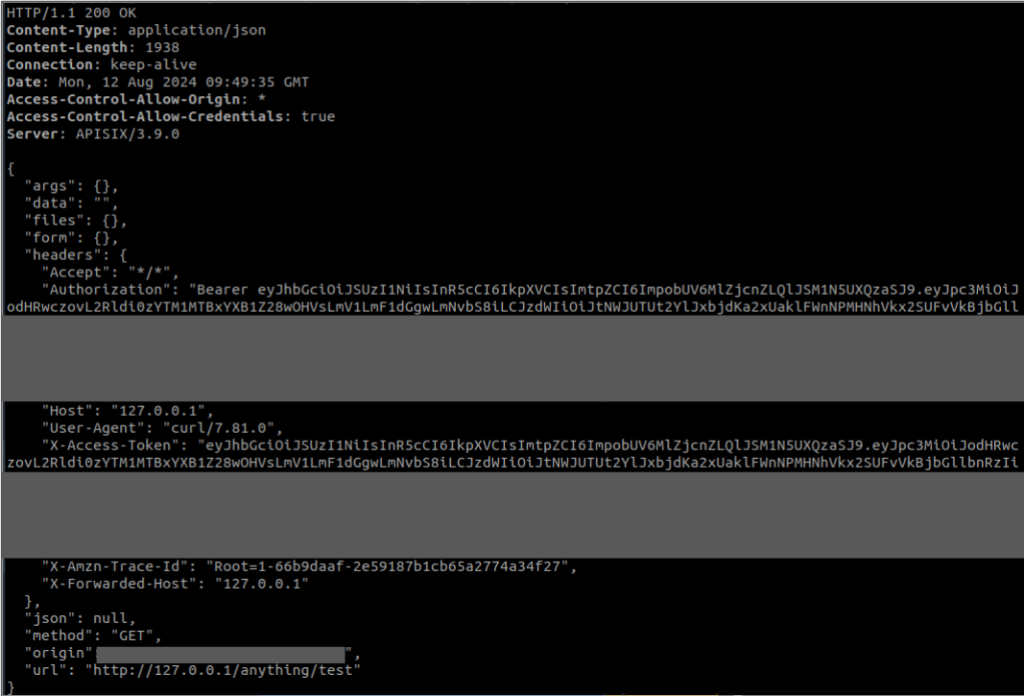
Conclusion
Apache APISIX is a powerful and flexible open source API management solution designed to handle real-time traffic with high efficiency. Its extensibility through custom plugins makes it an ideal choice for situations where you are looking for fine-grained, dynamic control over your APIs. The advantages of APISIX include its high performance, support for multiple protocols and its ability to scale in complex environments. In addition, its etcd-based configuration provides an efficient and robust way to manage distributed configuration, ensuring consistency and availability.
So much for today’s post. If you found it interesting, we encourage you to visit the Software category to see similar articles and to share it in networks with your contacts. See you soon!
