
Apache NiFi is a technology with great potential for working with large volumes of data from different sources. It performs data extraction, transformation and loading in an efficient and scalable way, which makes it a complete tool that covers the three phases of Big Data.
Next, we will define the key aspects to understand theoretically what it is and its main components. A series of best practices will guide us to create quality flows from the beginning of our learning. Finally, we will get started with the tool through a simple example.
What is Apache NiFi?
Apache NiFi is a tool for real-time integrated data extraction, processing and distribution. Its main objective is to facilitate the movement of data between different systems and to perform transformations on the data as it flows.
On the other hand, NiFi is based on Flow Based Programming (FBP). This paradigm defines applications as black-box process flows that exchange data through predefined connections by message transfer. These connections are specified externally to the processes. These black box processes can be connected indefinitely to form different applications without having to be loaded internally.
NiFi can also be understood as a grouping of atomic elements (groups of processes and processors) that can be combined to build a data stream.
Main components of Apache NiFi
- FlowFiles: are records that represent the objects moving through the system. They are characterised by being mutable along the flow and can be split or merged with other FlowFiles. Their structure is divided into:
- Content: the actual set of data being processed.
- Attributes: these are the characteristics associated with the FlowFile, which provide information or context about the data (metadata). They are stored in key-value pairs and the most important are:
- uuid: identifier of the FlowFile.
- filename: name of the file.
- path: place where the data is stored on disk.
- Processors: atomic elements that have the ability to perform a variety of tasks. For example, acquiring data from various sources, publishing data to external environments, and routing, transforming or extracting information from FlowFiles. Currently, there can be around 300 processors, covering a wide range of functionalities. In addition, NiFi allows the creation of customised processors. They are divided into two types:
- Sources (inputs): they are responsible for extracting or receiving data from different sources and converting them into FlowFiles.
- Sinks (outputs): their task is to send the processed data to the final destination.
- Process groups: they are the grouping of several processors.
- Connections: it is the union between components (draggable creation elements from the NiFi bar to the canvas, such as processors or groups of processors). It has a queue, where active FlowFiles are temporarily stored until the next processor can process them.
- Relationships: these are labels used within processors to specify how to route FlowFiles, depending on their processing. The most common are success, retry, failure, original and unmatched.
- Controllers: allows to know how the processes are connected and manages the threads and their assignments, used by all the processes.
Apache NiFi: Best Practices
Here are some best practices to keep in mind when working with NiFi to create optimised data flows, handle errors and secure the system.
- Define simple and concrete data flows: it is a good idea to modularise the flows according to the functionality you want to address. In this way, you can avoid getting giant monolithic flows that are difficult to manage.
- Naming the processors: given that the same processor is often used within the same canvas (sometimes even within the same workflow), it is crucial to have a way to differentiate them from each other.
- Avoid unnecessary dependencies: we must use connectors with queuing systems between processors. This way, in case of an error in a system (e.g. data collection) that forces to stop the flow, all those intermediate processes that can be performed without connection will continue. They will pass the results to the queue to be sent when the connection returns.
- Do not abuse state controllers: they can be used in some processors to store information internally for later use. But keep in mind that doing so can reduce both performance and scalability.
- Optimise the size of FlowFiles: it is possible to adjust the size of FlowFiles. However, it should be neither too small (to avoid overload), nor too large (high memory consumption and a huge point of failure).
- Optimise processing performance: it is a good idea to adjust the parallelisation of processing according to the workload by allocating an appropriate number of threads.
- Use Remote Process Groups: these are NiFi components that allow sending and receiving FlowFiles between different NiFi instances. In this way, the load is redistributed, thus improving performance and achieving greater scalability.
- Configure error paths in the processors: we use them to avoid loops, flow stoppages or data loss in case of connection problems or problems with the data itself. This ensures that the flow does not stop and data is not lost.
- Use penalty and soft standby in case of error: in case of error, they allow the system to wait for the services to have time to recover. In this way, system saturation is avoided.
- Use content and flow repositories on different disks: an advanced option that can be interesting is to use the SSD of the computer for the FlowFiles and Provenance repositories (metadata and history of FlowFiles that require frequent disk access). And, on the other hand, use the HDD for the Content repository (FlowFiles where heavy data is stored).
- Regular cleaning of the repositories: the content of the FlowFile, Content and Provenance repositories should be checked regularly. In this way, storage and performance problems can be avoided.
When working with systems in production with sensitive data, it is important to consider several aspects. For example, in maintaining the security and integrity of data and controlling who has access:
- Enable authentication and access control: to ensure that only authorised users and services can enter.
- Configure SSL/TLS: we can implement some security protocols to encrypt communications between the browser and the NiFi server. In addition, it is possible to configure certificate-based authentication between components.
- Enable event logging: NiFi has .log files to monitor both interface access and data flow activity.
- Use Nifi Registry: this is an external tool to manage the versioning of data flows. It is useful for keeping a history of stream configurations and tracking changes over time.
Installation and configuration of Apache NiFi on Linux
After knowing the basic concepts of the tool, we proceed to download it and install it in our environment. This example is done in Linux, so the installation manual that we will deal with will be focused on this OS. However, you can consult other alternatives in the official documentation Getting started with Apache NiFi.
Requirements:
- Java 21: although it could run on a previous version of Java, for the most recent version of this tool (NiFi 2.2.0) it is recommended to use Java 21. In many places on the internet you can find that it is compatible with Java 8, 11 and 17. Although, personally, I have tested the first two versions and they have not been able to run the service, generating the error shown below. Remember to export JAVA_HOME with this version and update the version with update-alternatives (for Linux users).
LinkageError occurred while loading main class org.apache.nifi.bootstrap.BootstrapProcess java.lang.UnsupportedClassVersionError: org/apache/nifi/bootstrap/BootstrapProcess has been compiled by a more recent version of the Java Runtime (class file version 65.0), this version of the Java Runtime only recognizes class file versions up to 55.0.
Commands of interest
- With
bin/nifi.sh runNiFi is executed in the foreground. bin/nifi.sh statusprovides information about the current status.

- Execute
bin/nifi.sh startto run NiFi in the background. bin/nifi.sh stopends the execution.

Installation and configuration step by step
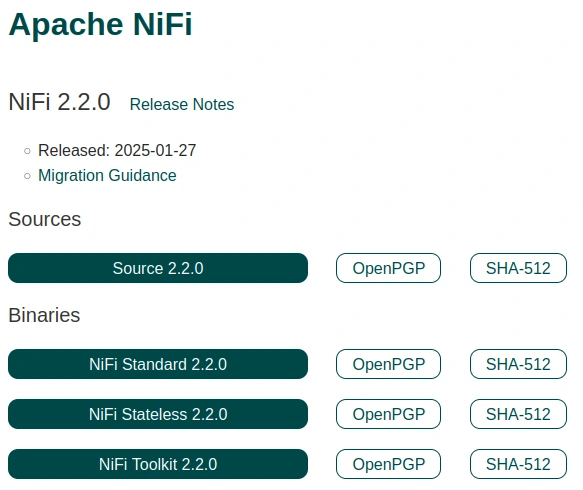
First, we go to the official Apache Nifi website to download the Standard 2.2.0 binary.
Unzip the file and run the following via console inside the folder:

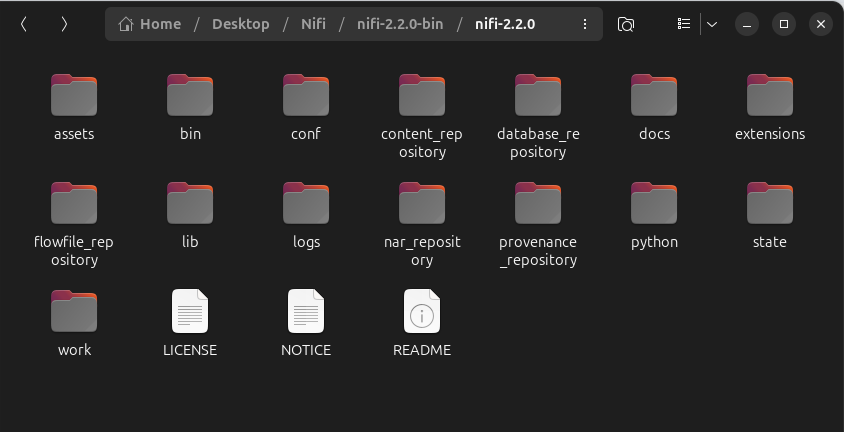
This command starts Apache NiFi in the background and the first time it is run. We see that a number of new directories are created.
Next, we run the following command to establish user and password credentials to log in to NiFi:


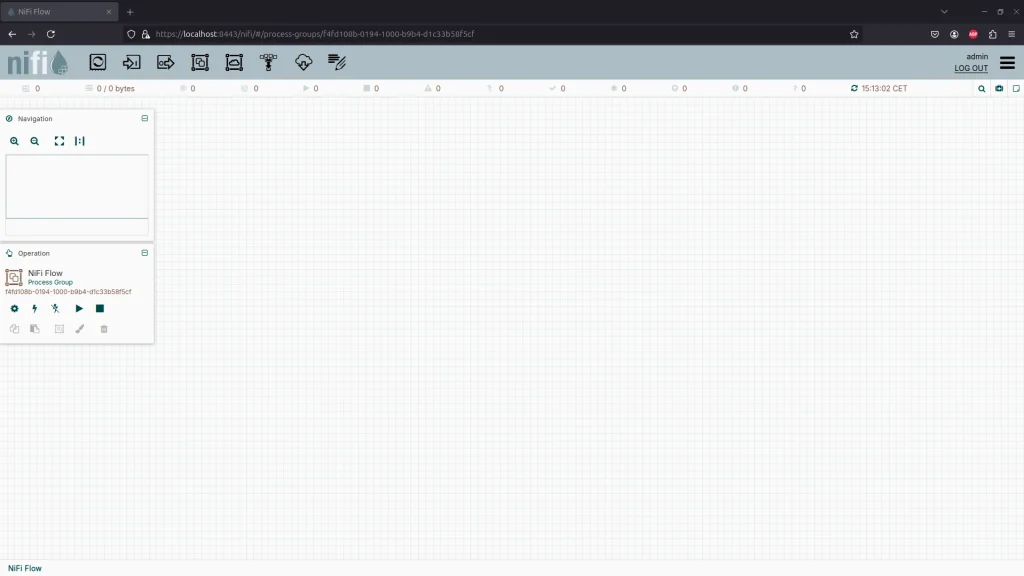
Go to https://localhost:8443/nifi/, login and you will get the following canvas:
At this point, we have the tool up and running. In the following sections we will start to use it with some simple examples to get started with it.
First steps with NiFi
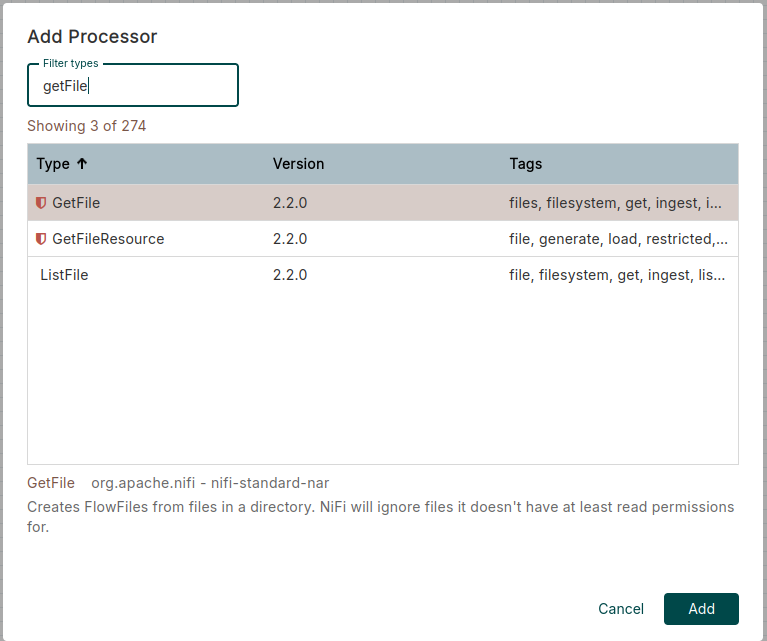
Now that we have the tool up and running, let’s create a simple data flow. First, we drag a processor onto the canvas (click on the first object in the top taskbar) and look for a GetFile. Then, we do the same process to create a PutFile.
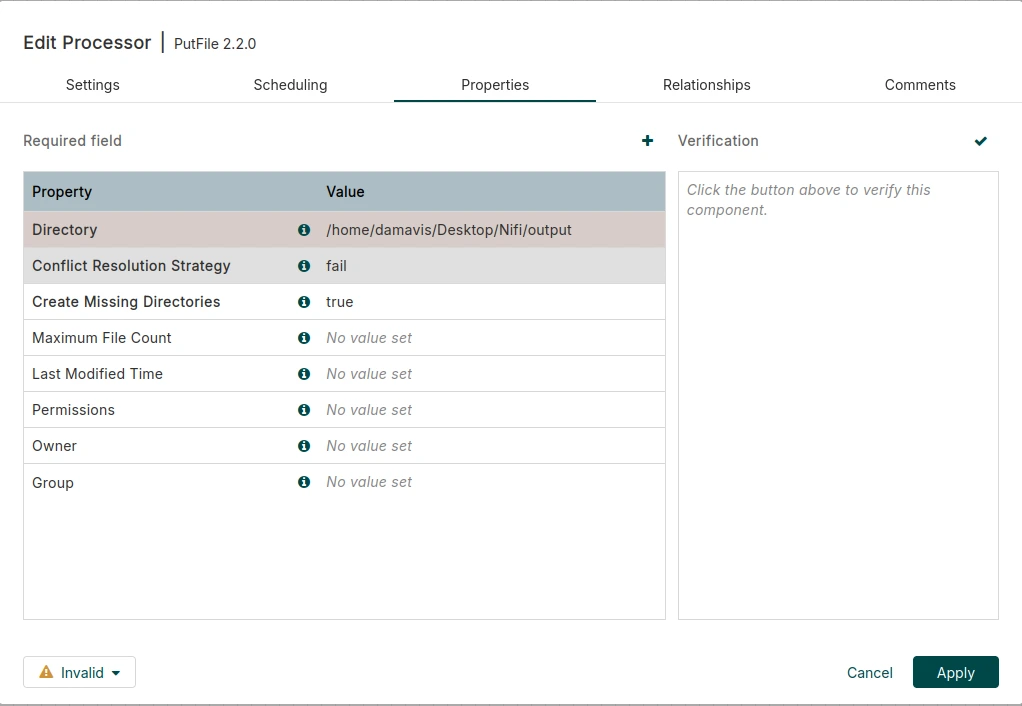
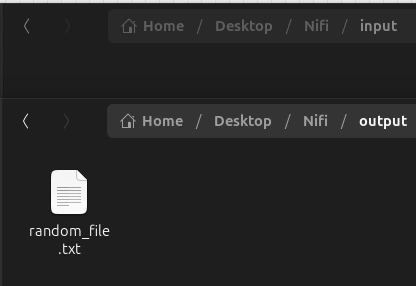
When we have the two processors, we proceed to create two files in our computer. To do this, we will copy their path (you can use input and output as names to make it more intuitive). Set the path of the source folder (input) to the GetFile processor and the destination folder (output) to the PutFile.
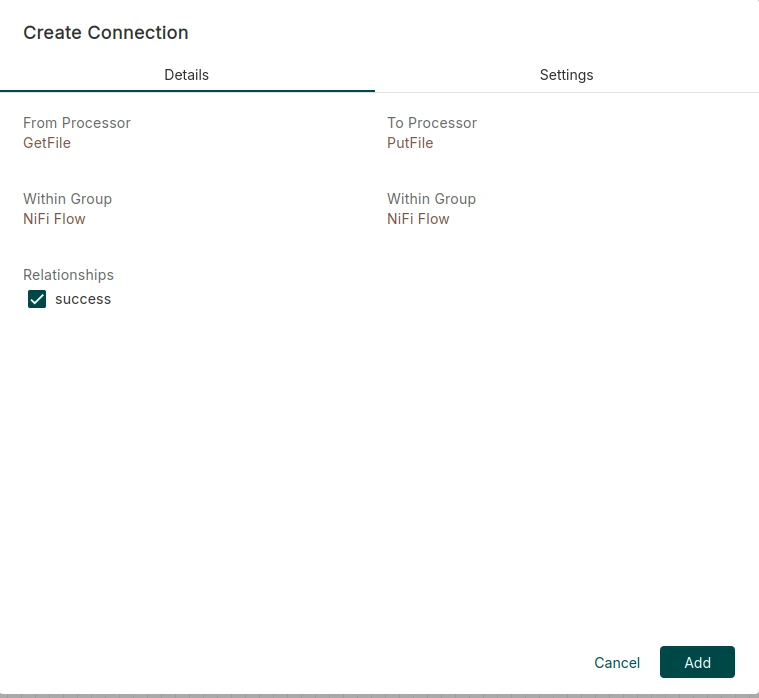
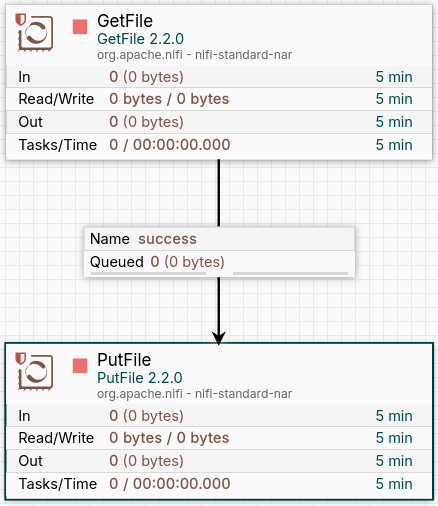
Once we have defined the processors with their respective paths, we move the mouse over the GetFile processor, click and drag the date to the PutFile processor. This action creates a connection between the two processors, where we click on the checkbox to establish the success relationship and then click Add.
At this point, we should have in our canvas the two previously created processors joined by a connection, which has a queue as we can see in the following image:
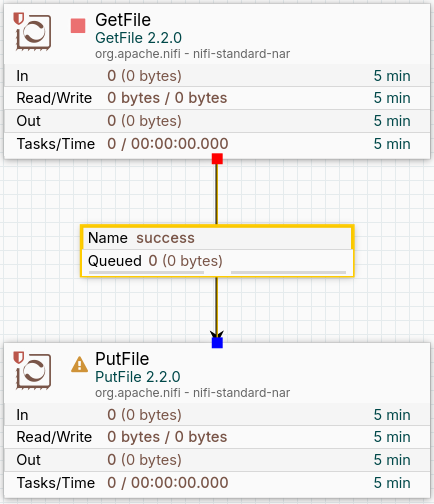
If you look closely, there is a warning symbol to the left of the PutFile processor. This indicates that we have not yet configured how the processor should respond in case of a successful or unsuccessful action. That is, the file is sent from the source folder to the destination folder, or fails to be sent. To do this, right-click on the processor and set the task to terminate in case of success and also in case of failure. In addition, click on Apply.
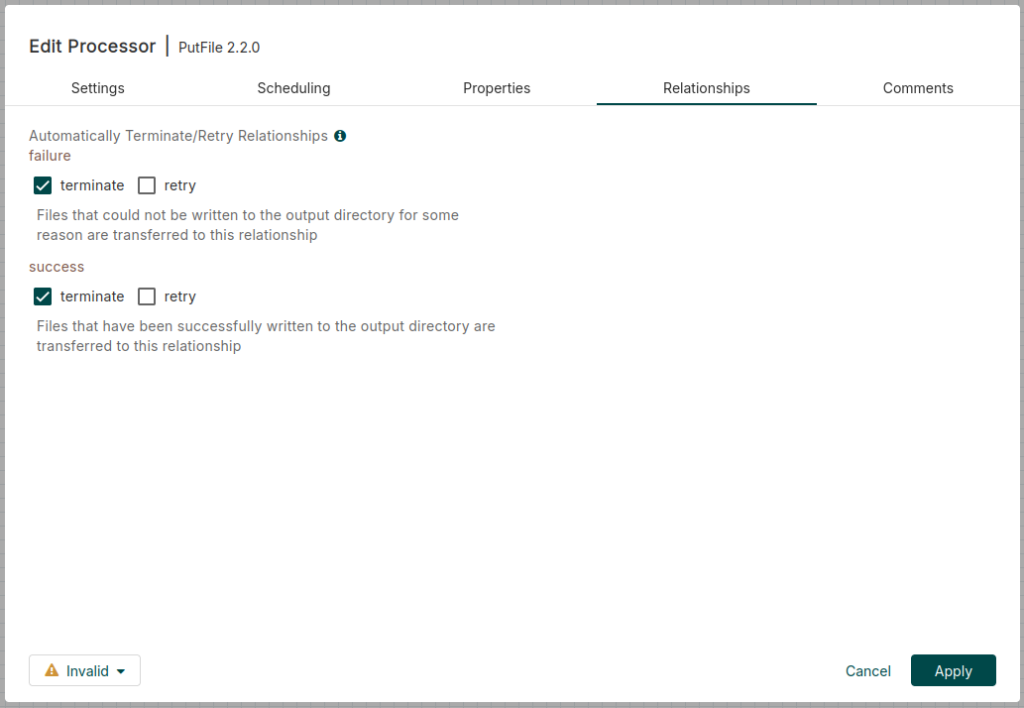
Now we can see that the previous symbol has disappeared.
Finally, we insert any file into the input folder and activate both processors with right click and Start. We can see how the file has been sent from the input folder to the output folder.
Conclusion
Throughout this article, we have gone deeper into the key concepts of Apache NiFi and learned the best practices to run our data flows efficiently and securely. In addition, we have been able to install it in our work environment and developed a small use case. Now, it’s your turn to put your new knowledge into practice and play with it a bit.
So much for today’s post. If you found it interesting, we encourage you to visit the Software category to see similar articles and to share it in networks with your contacts. See you soon!
