This is a continuation of what was described in the first part of this series of articles on Sensitive data management in BigQuery. Working with data in this tool can require control over who accesses it and how it is presented to users. We have already seen how through the use of tags and appropriate policy enforcement, we can have a great deal of control over which columns users will see, and even present them in an obfuscated way if necessary.
However, this approach allows us to control only one dimension of the table, at the vertical level. In this post, we will look at the solution that BigQuery offers us to control this data in the horizontal dimension, that is, at the row level.
Row level security in BigQuery
Analogous to the discussion of CLS (column level security), this process can be approached in several ways. One option when we need this kind of filtering could be the use of authorised views with an appropriate filter. However, this can be a good approach to the problem for specific cases, but hardly scalable. In this case, we will see how to do this using row level security (RLS).
The row level security is very interesting to establish specific access policies to define how much information from a table will be shown to the user/group according to a filter. These permissions can be set independently of the table itself, separating the definition of the policies themselves.
First of all, it is necessary to have certain permissions to be able to access this tool in BigQuery: BigQueryAdmin or BigQueryDataOwner.
The row-level access policies are implemented using DDL statements very similar to how UDFs, tables, etc. are created. Here is the structure to follow:
CREATE ROW ACCESS POLICY
  $filter_name
ON
$project_id.$dataset.table1
GRANT TO ("group:sales-us@example.com",
"user: jon@example.com",
"domain: example.com",
"serviceAccount:service@project.iam.gserviceaccount.com"
)
FILTER USING
  ($column_name=$value);
The sentence consists of 3 parts:
- First, we find the definition of the name and the table on which it will have effect.
- Secondly, a block where we indicate to whom the filter will be applied. As can be seen in the example, we can include a specific user, a group, a domain or even a service account.
- Finally, we will find the filter itself. This works as a WHERE clause added after the table, so it is fully customisable. We can concatenate the different conditions and/or refer to other tables by means of sub-series. It is also interesting to use functions like
SESSION_USER(), where we can dynamically compare our session user with the other values if necessary.
Defining and applying access policies
Next, we will define some policies and see how they are applied to a specific table. We will continue working with the same table on which we have already managed the policies at column level. (To facilitate the following examples, the masking present for the email field has been removed).
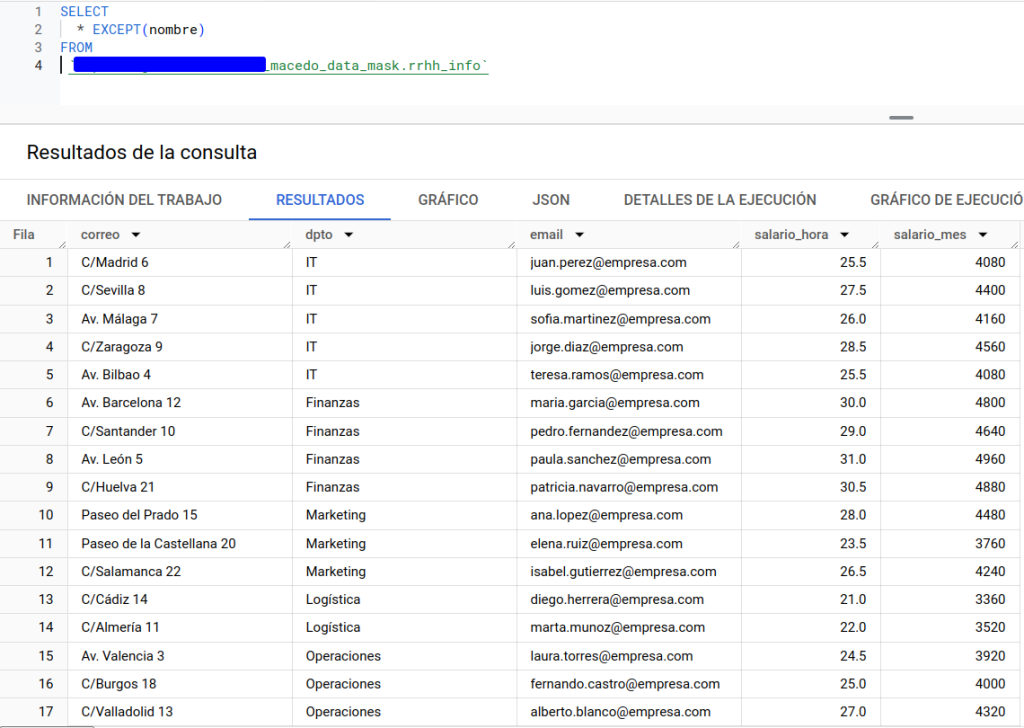
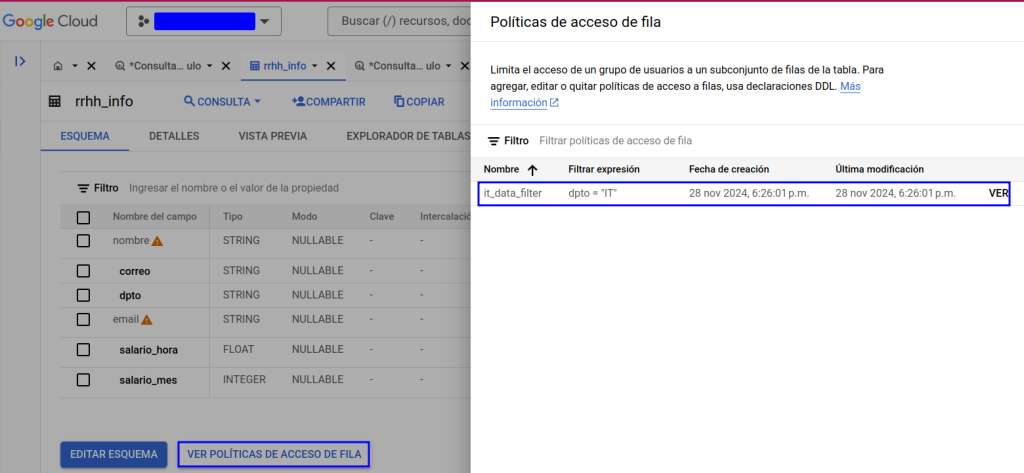
In this case, we create an access policy that will do the following: it will show our user only those rows corresponding to the IT department. This could be a good example of how to control access to a group. For simplicity, in the example it will only apply to the current user as we see below.

If we want to check which filters are being applied on our table, we can do it from the BigQuery UI (also available through the bq client in the terminal) in the schema tab:
If we try to access the data, we will see the following:
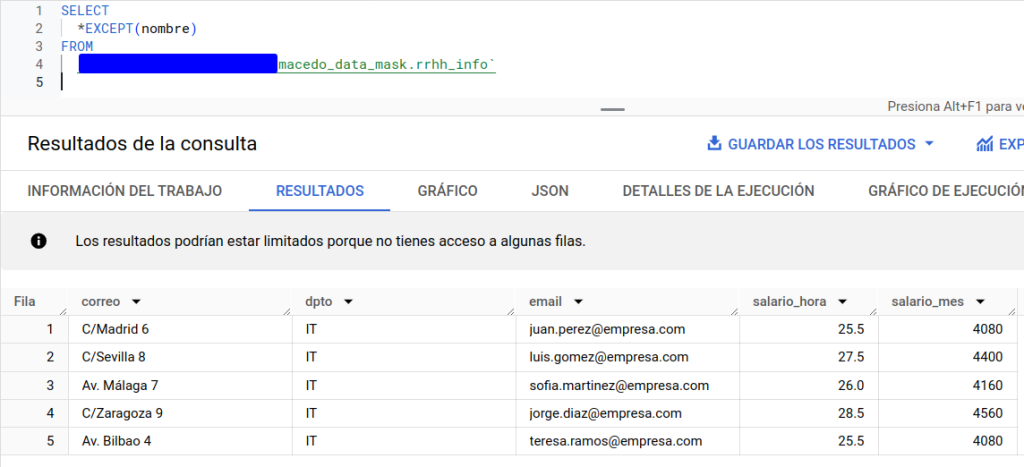
As expected, we only have access to the IT department. Next, we’re going to include another condition in our filter, but we’ll use a subquery on a reference table. This can be a very suitable approach if we need an access control list in which we have the set of users that we want to access the table.
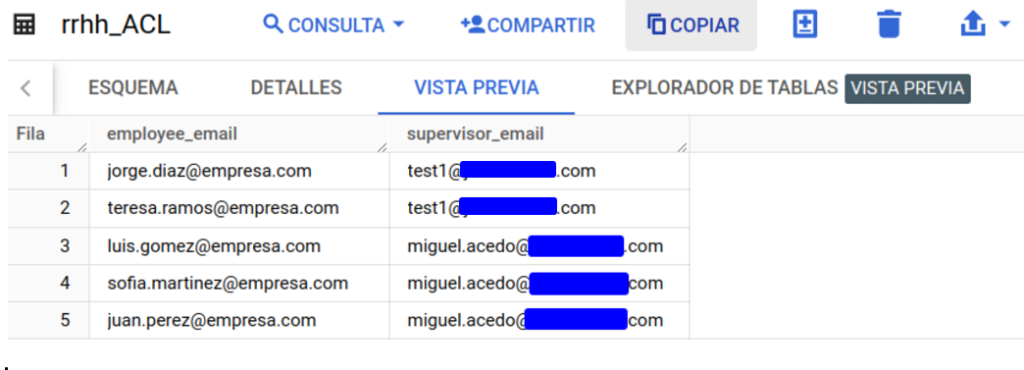
Let’s have, for example, an ACL that will contain the name of the supervisor of a set of workers. These workers are the ones we find in the initial table. The supervisor will only be able to see data of his employees. Here is the example table:
We proceed to alter the filter that is applied to our table. We have added as a condition a subquery that points to a completely different table than the one we are filtering, using, in addition, the session_user() filter.

Although a concatenation of conditions in terms of filtering has been made for this case, it is important to mention that, in the same way, different filters could have been applied to achieve the same behaviour. Or, on the contrary, more complexity could have been added to the filter. This all depends on the requirements we have.
If, again, we run the query, only those employees whose supervisor matches the email to which the user session belongs are displayed.
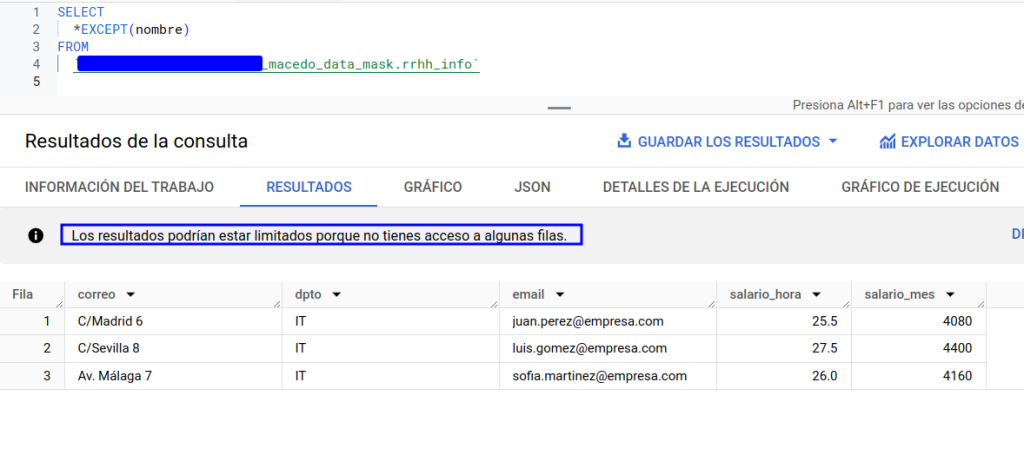
A user, whose permissions are the same as those of the test user on the table, has been asked to access. As we can see, as there is no more than one user in the list of permissions, a total of 0 records are shown.

Deletion of data access policies
The deletion of such policies is also done by DDL statements of the type:
DROP ROW ACCESS POLICY my_row_filter ON project.dataset.my_table;In case there is only one single policy defined (or if you need to delete all of them), the deletion statement will be:
DROP ALL ROW ACCESS POLICIES ON project.dataset.my_table;Conclusion
As we have seen, you can control in a very simple way the amount of records that the user can access. The generation of these row access policies allows us to have great control, support a great complexity of filtering and perfectly complement our column access policies.
We have seen how we can control in a very simple way and with a total granularity who accesses each of the records in our table without the need for duplicates, views, separate datasets, etc.
If you found this article interesting, we encourage you to visit the Data Engineering category to see similar posts to this one and to share it on social networks. See you soon!

